Texture: Environment
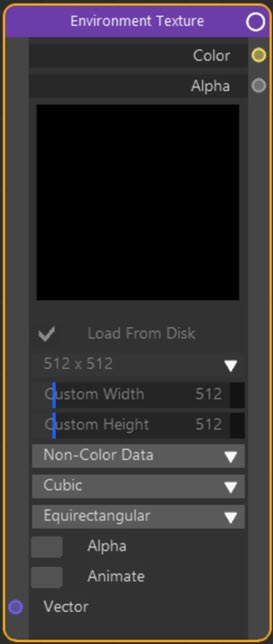
Node Interface
Example Output
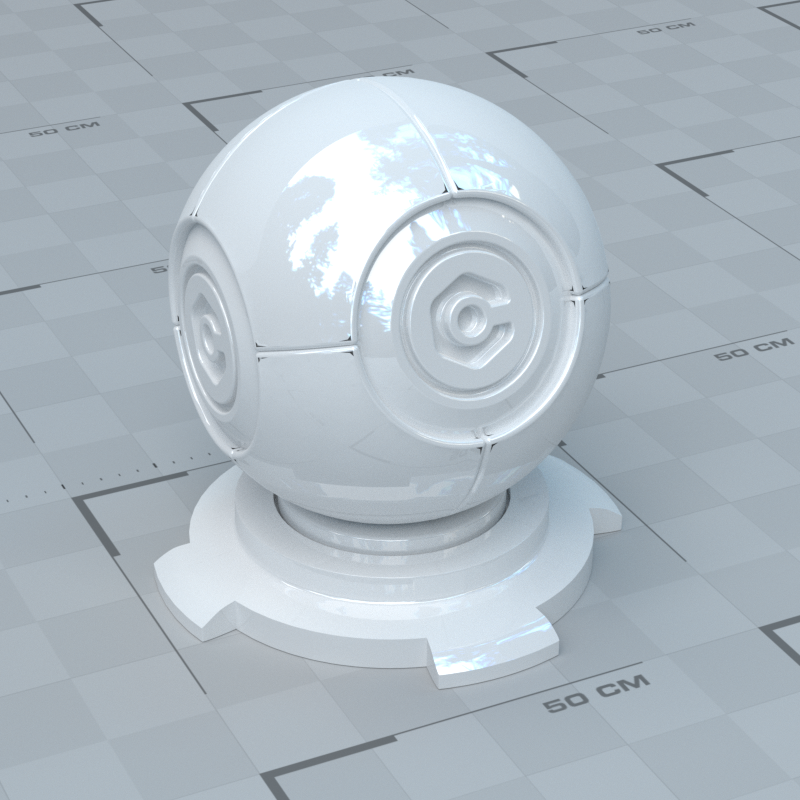
There are no lights in this scene other than an HDR image applied to a cyEnvironment object.
Overview
| Function | Light a scene using an image |
| Nearest C4D equivalent | Simple material with an HDR image and applied to a suitable object such as a Sky |
This node is used when lighting a scene using image-based lighting. To set this up in Cycles 4D, please see this short tutorial.
Settings
Note: a * symbol next to the name indicates the parameter also has an input port. A # symbol indicates that the parameter can only be changed with an input node, not in the node itself.
Image thumbnail
Shows the currently selected bitmap, or black if none is selected. You can choose a bitmap by using the Texture link in the right-hand pane of the node editor.
Texture
This setting is only seen in the Node Settings pane. It is here you can choose a bitmap image or shader to load.
Load From Disk
If this switch is checked, Cycles 4D will determine the image size when loading it from disk. If it happens to get it wrong, choose Custom... from the Texture Size menu and enter the correct width and height in the custom width and height fields.
 There is a limitation in that if you load a movie texture into this node, 'Load From Disk' must be turned off. If it isn't, the movie will not load because the Cycles engine cannot load a complete movie, and instead samples the required frame from the movie as needed.
Texture Size drop-down menu
This menu contains a number of presets for common image sizes. This size is only used for the display of the image in the editor, it has no effect on the rendered result. If you have a high-resolution image you can choose a larger size, or select Custom... and enter the size into the Custom Width and Custom Height fields.
Custom Width and Custom Height
The image dimensions when Custom is chosen from the image size menu.
Color Space drop-down menu
This can be either Color Data or Non-Color Data. It's a slightly confusing name because if it is set to Color Data Cycles 4D will apply a colour-space correction to the image. Most of the time you will be using an HDRI image in this node so you can leave this as the default Non-Color Data.
If you are using a bump or alpha map, for example, you should also ensure that it is set to Non-Color Data in case the render engine tries to convert the image data into colour.
If you use a non-HDRI image you may need to change this setting to Color Data to ensure the correct colour space is used.
Texture Interpolation drop-down menu
This menu selects how the image data will be interpolated over a large area. The default is cubic, which gives smoother interpolation but is slower.
Linear gives lower-qualty interpolation but is faster than Cubic.
Closest basically means no interpolation; textures will stay pixellated which can be a required feature.
In Smart mode Cycles selects internally to use either bilinear or bicubic interpolation.
Texture Projection type drop-down menu
This menu chooses between two types of projection for HDR image. Which one you choose depends on the method used by image creator.
Mirror Ball
A spherical light probe was used to create the HDR image.
Equirectangular
A series of rectangular images stitched together were used when creating the HDR image.
Alpha
 This switch exists to correct a problem with Cinema 4D and alpha channels.
If you use the Alpha output of this node as an input to the Alpha port of an Object Material output node or a Principled BSDF node, and the bitmap does not have an alpha channel, Cinema 4D returns the image itself as the alpha. This may work as an alpha but may also lead to aliasing on edges when rendered. If you find that is the case, check this switch.
For reference, note that .JPG files never have alpha channels.
Animate
Check this switch if you are using an animated texture. The real-time preview window needs to update itself as the scene time changes but there is no way to determine automatically if a texture is animated, so this switch must be checked manually to instruct the preview to update itself with each frame.
Important: when using an animated texture you must also untick 'Load From Disk' for the animation to work. See the 'Load From Disk' switch for more details. This is not necessary with an animated shader such as a Cinema 4D Noise shader.
Vector #
This sets the coordinate system to use for the bitmap. Most of the time you can leave this as it is, since the default setting is fine for the cyEnvironment object.
Output
Color
Colour output from the loaded image.
Alpha
The output consists of alpha values.