Input: Light Path
Node Interface
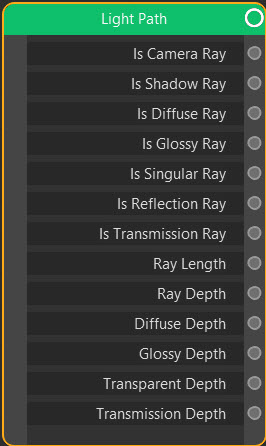
Overview
| Function | Returns information about light rays which hit the point on the surface to be rendered |
| Nearest C4D equivalent | None |
Cycles 4D is a raytracing render engine. Rays are fired from the active camera into the scene and depending on the object they hit, can be bounced, reflected, transmitted through etc. the various scene objects and are eventually seen by the camera.
If any of those events happen, the ray is converted into a different type of ray (they start out as camera rays). This node tells you what kind of ray the camera sees and some information about it. You can then use this to modify the shaded surface of the object.
Detailed information about the different types of rays can be found in the Blender manual.
Although it seems rather abstruse this node is quite useful but beyond the scope of this manual to explain the uses of all the outputs. Additional references can be found on-line, such the Blender manual link above.
Settings
None.
Output
Note: all the outputs beginning with 'Is' return a boolean value, that is, either 1 if the ray is that type of ray or 0 if it is not. The remaining outputs are all numeric values.
Is Camera Ray
This is quite useful if you want a visible mesh light which doesn't illuminate anything. Plug this output into the Strength port of an Emission node. Since the camera will no longer see diffuse rays, reflections, etc. from this light, the light is visible but does not add to the scene illumination or cast shadows.
Is Shadow Ray
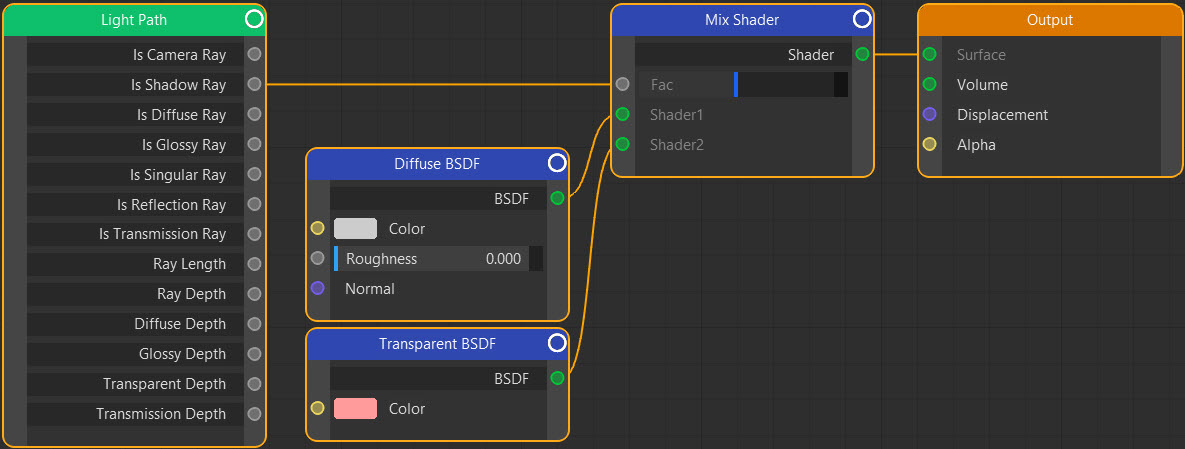
This output allows you to change the shadows cast by the object. For example, you can use it change the shadow's colour:
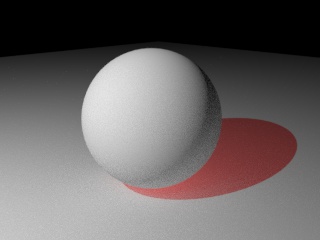
In this case it is used like this:
Is Diffuse Ray
These are rays which have bounced off a non-glossy surface. If you link this to the Strength port of an Emission node which is used to emit light from a mesh, and you have an object in the scene with both a diffuse and glossy component in the material, the camera will only see the diffuse component and not the glossy reflection.
Is Glossy Ray
These are rays which have bounced off a glossy surface, i.e. a reflection. It is used in the same way as 'Is Diffuse Ray' but for glossy rays.
Is Singular Ray
As for 'Is Glossy Ray' but only if the distribution algorithm in the Glossy BSDF node has been set to 'Sharp'.
Is Reflection Ray
These are rays which have bounced off a glossy surface. If you link this to the Strength port of an Emission node which is used to emit light from a mesh, and you have an object in the scene will both a diffuse and glossy component in the material, the camera will only see the glossy reflection and not the diffuse component
Is Transmission Ray
These are rays which have passed through a surface shaded with a Glass or Translucency Shader, etc. it is important to note that the Transparent shader is different: rays which pass through an object with only a transparent shader are not changed into transmission rays.
As with diffuse and reflection rays, you can use this output to see only transmitted rays or to ignore them completely.
Ray Length
The distance a ray has travelled in a transparent object. This can be used for some interesting effects:
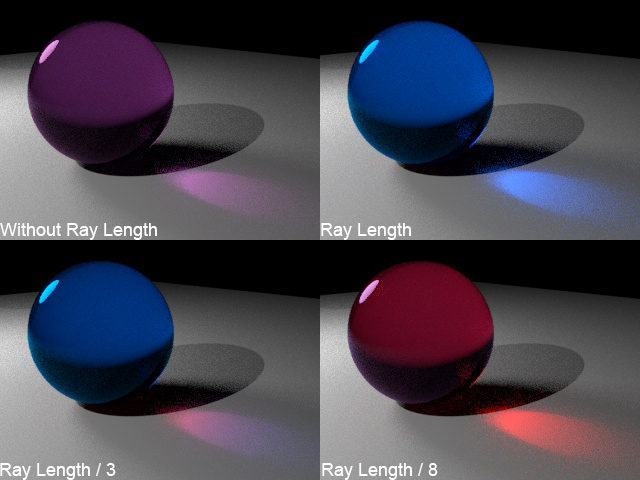
In this example, the sphere has a material like this:
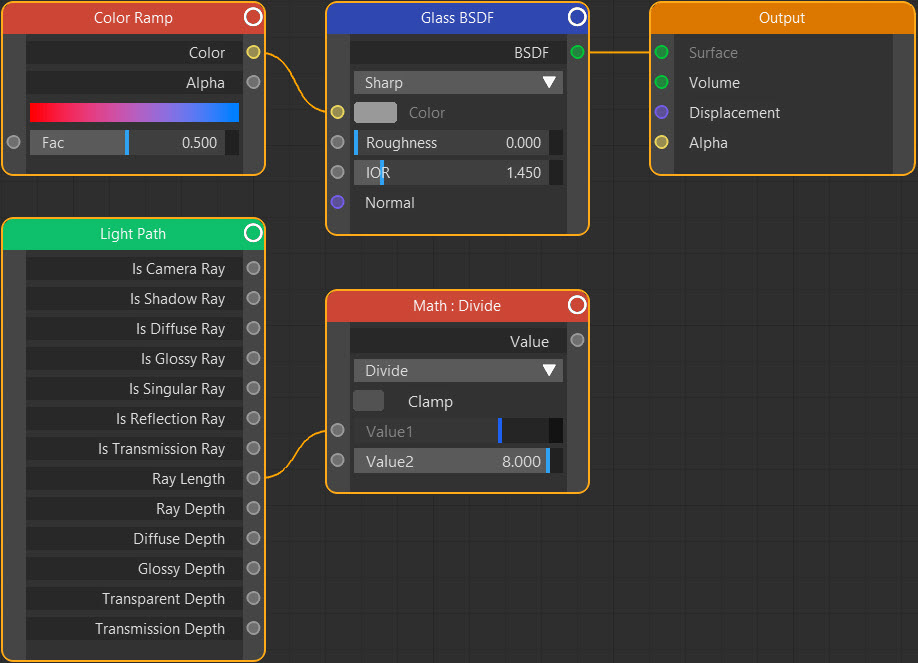
In the top-left pane, the Math node has not been connected, so the Color Ramp node sets the colour of the Glass node and the caustic. As expected, both are purple. In the remaining panes the Math node has been connected to the Fac input of the Color Ramp so the Ray Length drives the colour of the glass and transmitted light. The three panes use different values for Value2 in the Math node, so as that value increases the ray length value is reduced and the light moves more towards red (because that is at the left of the Color Ramp).
Ray Depth
This is the number of bounces a light ray has made. With it, you can alter how bounced rays are rendered, or if they are rendered at all. Note that light passing through a Transparent shader does not count as a bounce.
You can use this output for things like this:
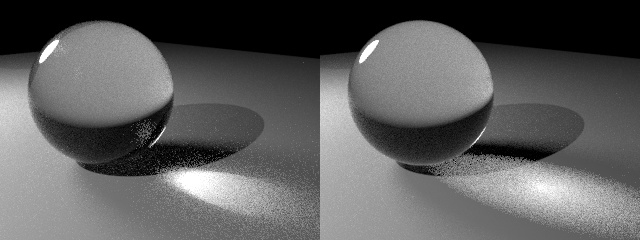
The scene shows light passing through a sphere with a Glass shader, creating caustics. On the left, this is the basic result; note that the quality of the caustics is quite poor, with lots of scattered dots around the main caustic. This is because light is bouncing around inside the sphere and emerging at different angles. There are ways to fix this, such as increasing the number of samples, but the Ray Depth can be used for a quick solution.
On the right, the ray depth output has been used to control the Fac input of a Mix shader which is mixing the Glass and a Transparency shader. If the depth is more than 1 (that is, if there is more than one bounce) the material is treated as completely transparent, so is not refracted and does not create a caustic. The result is a caustic which looks a lot cleaner and renders faster but - and this is the downside - at some loss of physically correct behaviour and therefore realism.
Diffuse Depth
The same as Ray Depth but is the number of bounces the ray has made from a dffiuse surface.
Glossy Depth
The same as Ray Depth but is the number of bounces the ray has made from a glossy surface.
Transparent Depth
This is the same as Ray Depth, but recall that light passing through a transparent object does not bounce, so Ray Depth cannot be used. Transparent Depth is the number of times a ray has passed through a transparent object.
Transmission Depth
As for Ray Depth but outputs not the total number of bounces but the number of times the ray has passed through surfaces shaded with the Glass or Translucency shader, etc. (but not the Transparency shader).
Node tree