Rendering with Cycles 4D
Rendering with Cycles 4D is very easy. Just add objects and at least one light to the scene, select Cycles 4D in the Renderer drop-down menu in the Cinema 4D render settings, and render. You must add a light; Cycles 4D does not make any use of the Cinema 4D default light except in the viewport.
Please note that to render materials they must be Cycles 4D materials. Ordinary Cinema 4D materials and shaders will not work, nor will other materials such as the X-Particles materials.
CPU vs. GPU rendering
Cycles 4D can use the computer's CPU or compatible GPU(s) to render a scene.
In almost all cases you will see no difference between renders carried out on the CPU and those carried out with CUDA (note that OpenCL is much more limited than CUDA and you may well see significant differences between CPU and OpenCL renders, depending on the features to be rendered). There is one difference between CPU and CUDA renders to be aware of, however: this is when rendering volume shaders. See the note on the Known Issues page for more details of this limitation.
If you select GPU rendering, Cycles 4D uses the graphics card's memory when the scene is rendered. Since this is limited compared to the main computer's memory, you may see out-of-memory errors when rendering. If you are rendering to the picture viewer, the render engine will automatically switch to the CPU to render the scene.
 The automatic switch to CPU will not occur when rendering to the real-time preview window, only when rendering to the viewport or picture viewer.
Render Settings
Cycles 4D has a number of settings you can change. These are in three tabs, as shown below:
Click the relevant image to go to the page dealing with these settings.
Settings
The main render settings tab:

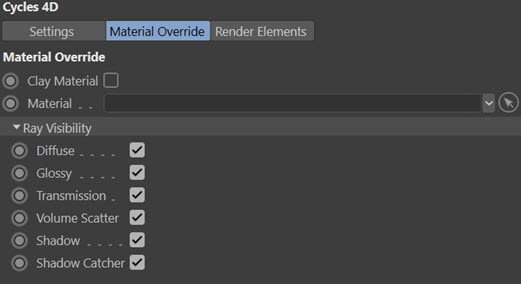
Material Override
Provides additional control of how materials are dealt with at render time:
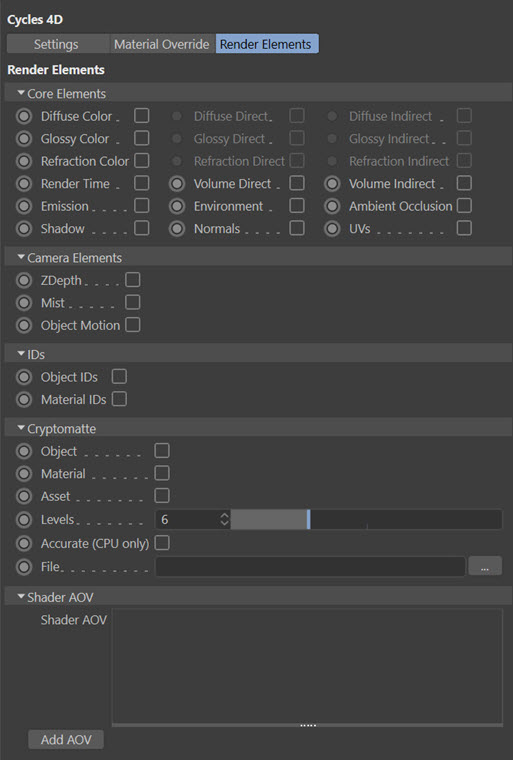
Render Elements
This tab controls multipass rendering in Cycles 4D.