Node Groups
With node groups you can, as the name suggests, combine a number of nodes into one node group with its own inputs and outputs. This can be extremely useful. Not only does it reduce the clutter in the node editor, but since you can save and load groups you can reuse them in other projects without having to build them from scratch every time.
We have prepared a small pack of example node groups which you can download from this link. These groups were all prepared by INSYDIUM and are free to use in any way you wish. They show how node groups can be used to wrap common tasks in a convenient single node rather than in a (possibly large) node tree.
A node group example
Consider the following node tree:
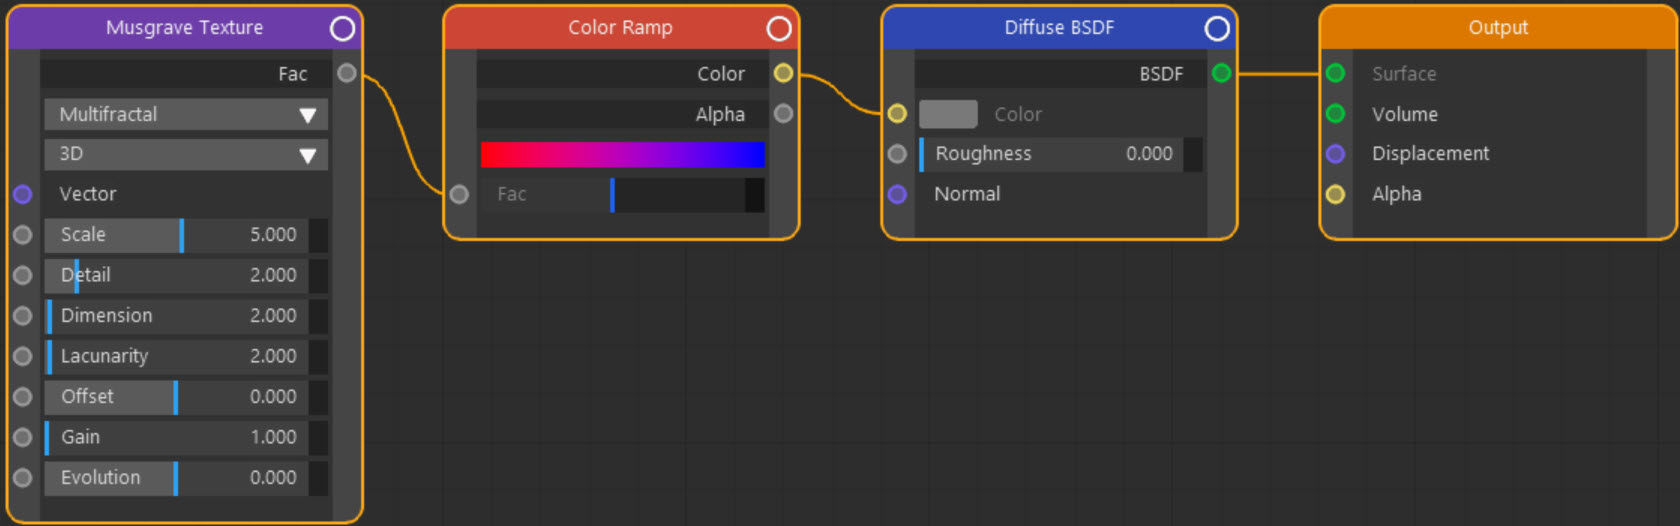
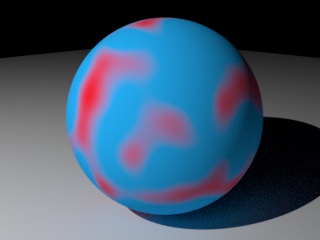
This is a simple tree which pipes the output from a Color Ramp into the output shader. The actual colour from the color ramp is driven by a Musgrave Texture node (basically a noise texture). The result looks like this:
Now suppose that all you really need from this tree is to be able to change the scale of the noise, and that you don't want to see the rest of the tree. You can do this by combining the nodes into a node group.
Creating the group
To do this, select the nodes to be included and right-click anywhere in the editor. From the context menu, choose 'Group Selected'. You will see this in the editor:
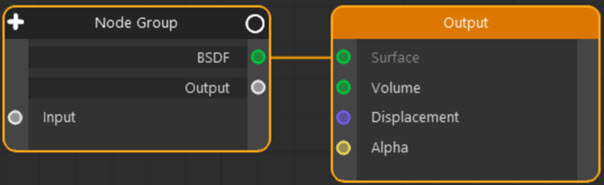
 Note that you cannot include an output node in a group. If you try, it simply won't be added to the group.
Another way to create a group is to right-click in the node editor and select from the context menu 'Add->Empty Group'. This will do exactly that - create an empty group with no nodes. Once you open the group, you can add nodes in the usual way.
Grouping connected nodes
Consider this node tree, with the Image Texture and Emission nodes selected:

If you right-click in the editor and choose 'Group Selected' from the context menu, the node connections are preserved, so you see this:
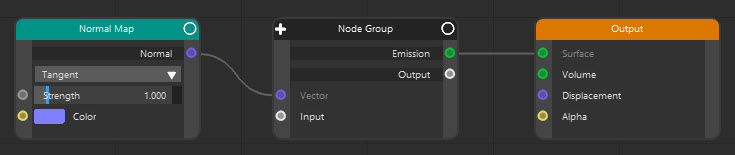
As you can see, the node group ports to maintain the existing connections have been created automatically for you.
Editing the group
To open the group up so you can edit the nodes inside, click the ![]() button at the top-left corner. In this example you would see this:
button at the top-left corner. In this example you would see this:

As you see, all the original nodes are still there. But right now it doesn't do anything. The group has an output and an input port, but if you link them to another node, nothing will happen. To resolve that, we need to create some internal connections.
Creating the output
This is simple. The output we want is the BSDF output from the diffuse BSDF shader. So drag from the green BSDF port to the white port named 'Output' to connect them. You will then see this:
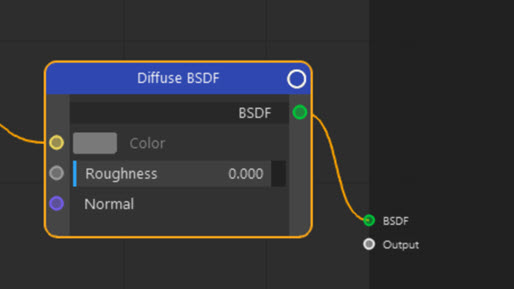
The group now has an output port named BSDF. It still has the port named Output, so if we wanted to we could add some other type of output by linking a port to the Output again. This would create another port. In other words, every time you link an port to the Output, it creates a new port for you.
Creating the input
We only want to expose the Scale in the Musgrave node, so drag from the Scale port to the white port named 'Input' to connect them. Exactly the same happens as with the output port:
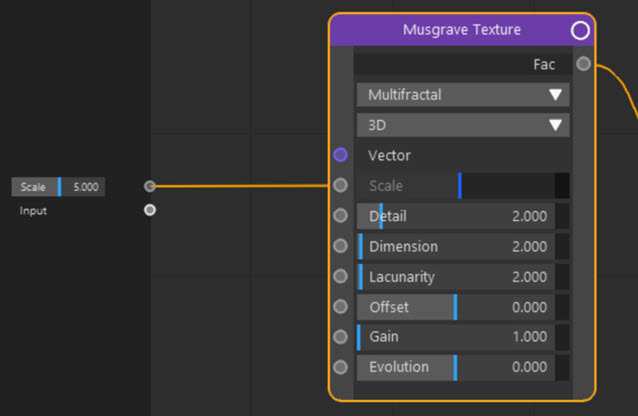
As you can see, the group now has an input port named Scale, and you also are shown the value it will have if nothing is connected to it. You can alter that value by double-clicking immediately to the right of the value field and entering the new value, or by dragging the slider marked by the blue bar.
Once again, you can connect as many inputs as you need.
Other ways to add ports
You can also add a port by right-clicking in the editor when the group is open, or on the group itself if it is selected but closed, and select 'Add Input' or 'Add Output' from the context menu. If you choose Add Input you will have to choose what kind of port you want it to be. If you link from an existing port to the Input port in the group you don't have to do that - Cycles 4D will created the correct port type for you. You will also need to rename the new port and give it a default value.
Renaming and deleting ports
If you want to do either of these things, right-click the port name and from the small context menu select 'Remove Port' (to delete it) or 'Rename Port' (to rename it).
Changing port order
If you want to reorder the ports, right-click on the port and choose 'Move Port Up' or 'Move Port Down' as required.
Promoting ports
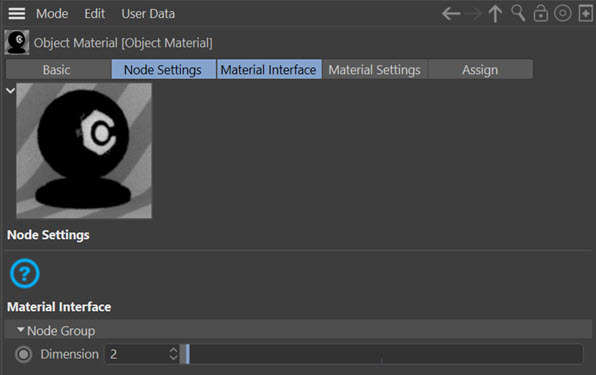
If you right-click on an input port, one option is 'Promote Port'. If you select this, the port is moved to a new tab in the material settings (and it is also present in the attributes manager) named 'Material Interface'. You can see it in this screenshot, where the 'Dimension' input port from a group has been promoted and is no longer seen in the 'Node Settings' tab:
You can remove a port from this tab and put it back in the 'Node Settings' tab by right-clicking it and choosing 'Demote'.
Locking a group
You can password-protect a group so that other users can't open it. To do this click the ![]() button at the top-right of the group. You will see a dialog box like this:
button at the top-right of the group. You will see a dialog box like this:
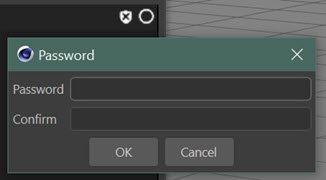
Enter the password to use and click 'OK'. When you close the group and try to reopen it, you will be prompted for the password.
If you want to remove the lock, open the group then click the lock button again and clear the password fields. Click OK and close the group; now it is no longer locked.
Closing the group
We are done with editing the group now, so we can close it either by using the breadcrumb bar, or by pressing the 'U' key. The group now looks like this:
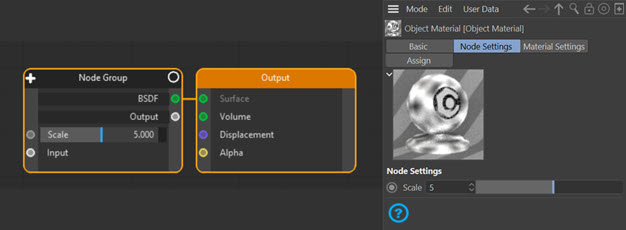
Note that you can change the value of the Scale input port just as if this was a single node, and you can edit that value in the Node Settings tab if you prefer.
Connecting the group
All that is needed now is to connect the group to the Output port. Simply connect the group BSDF output port to the Surface input of the output port and it will work just as the original node tree did. If you wanted to you could also connect another node to the Scale input port.
Note: connecting the ports labelled Input and Output will do nothing at all, since these ports are not connected internally. They are simply placeholders for new ports you might add. If you don't want to see them, right-click on the group's title bar and from the context menu select 'Hide Unused Sockets'.
Other group operations
You can do a few other things with groups. These include:
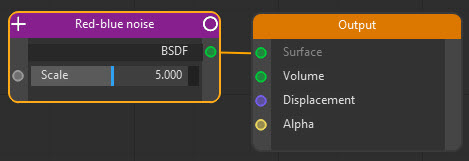
- rename the group: right-click the group's title bar and choose 'Rename Node' from the context menu;
- change the title bar colour: right-click the group's title bar and choose 'Change Node Color' from the context menu;
- split the group back into its constituent nodes: right-click the group's title bar and choose 'Disband Group' from the context menu; the group is deleted and the nodes inside appear in the node editor;
- hide any unused ports, such as the white Input and Output ports: right-click on the group's title bar and from the context menu select 'Hide Unused Sockets';
- double-click the title bar to show only the title and not the ports, just as you can with any node.
Note: if the group is closed, you need to select the group first before doing these operations, if you don't select it you may not be able to access the entries in the context menu.
By doing things like this you can end up with a nice neat group that does just what you want without all the clutter in the node editor:
Saving and loading groups
A really useful feature of groups is that once you have it working you can save the group then reload it in another material.
Saving a group
With the group open, or selected if it is closed (this is important), right-click anywhere in the node editor and choose 'Save Group...' from the context menu.
Navigate to the location to save the group in, give it a name, and click 'Save'.
Cycles 4D group files have the extension 'cyG' by default but this is not mandatory.
Loading a group
To reload a group, right-click anywhere in the node editor and choose 'Load Group' from the context menu. Navigate to where the group is saved and load it in the usual way.
Alternatively, you can drag and drop a node group from the computer file system into the node editor. Locate the group in Windows Explorer or Mac Finder and simply drag it into the editor window.
You can also load a group within a group. Just carry out these steps inside an open group and your group will now contain a group - you can even load the same group into itself!