How To: Use Attributes
This short tutorial shows how the cyAttribute tag and Attribute node can be used to extract data from a Cinema 4D vertex map tag and used to colour and add displacement to a sphere.
See also the separate example page on using User Data with attributes.
Many thanks to Jon Bosley for allowing us to use his scene in this tutorial.
1. First, add a sphere to a new scene, make it editable, subdivide it and vertex paint it to give something like this:
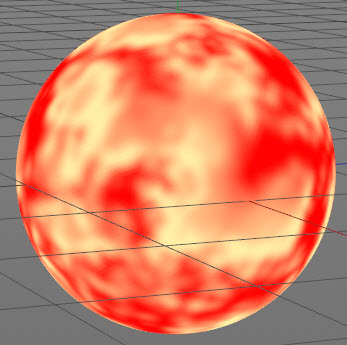
The sphere now has a vertex map tag containing the vertex map data.
The following steps 2-6 are the traditional (long) way of creating attributes. We continue to show this here as it helps to explain what is happening with attribute tags and nodes, but there is also a much quicker way to achieve the same result. See this section for details of how to bypass steps 2-6 and speed up your workflow. It is recommended that you read through these steps at least once, however, for best understanding of how the attributes work.
2. Add a cyAttribute tag to the sphere. This is required so that the vertex map tag containing the data can be specified.
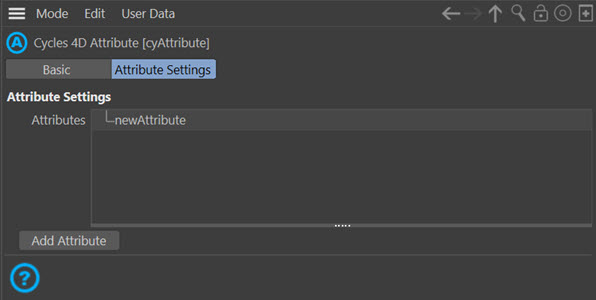
3. In the cyAttribute tag, add a new attribute by clicking the 'Add Attribute' button. By default this is named 'newAttribute':
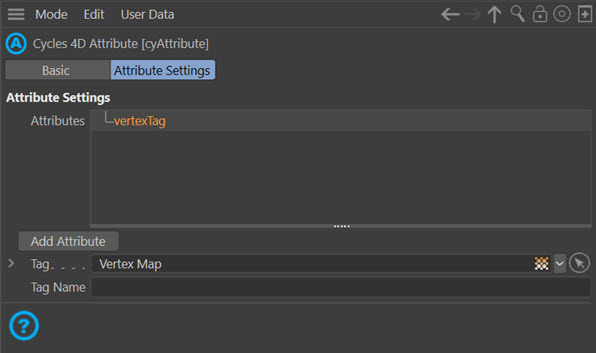
4. Rename the attribute to a name of your choice; in this case we will call it 'vertexTag' but it can be whatever you like. To rename it, simply double-click the attribute name.
5. Select the attribute in the list and a new field simply named 'Tag' will appear. Drag and drop the vertex map tag on the sphere into this field:
We are now finished with the cyAttribute tag.
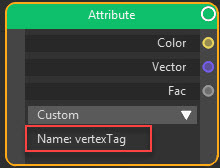
6. Create a new Cycles 4D object material and add it to the sphere. In the node editor add a Attribute node. Now we need to specify which attribute the node should use, so in the Name field of the node, enter the name of the attribute from step 4 - that is, 'vertexTag':
7. The node will now extract the data from the attribute, which gets it from the vertex map, and outputs this to the output ports. The values in the vertex map are actually numeric values ranging from 0.0 to 1.0, so we can use the Fac output, but you could in fact also use the Color output - in this case, since we simply want to use the data as an index value into a color ramp, it has the same effect.
Add a Color Ramp node to the node editor and link the Attribute node Fac output to the Color Ramp Fac input:
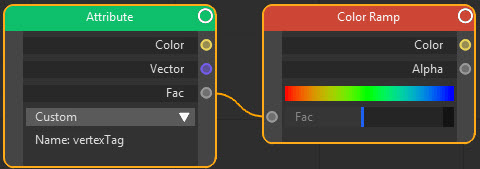
Note that the gradient in the Color Ramp has been edited to show a spectrum gradient. Since the input Fac value will range from 0.0 to 1.0, it will act as an index into the gradient; values of 0.0 will be red while values of 1.0 will be blue.
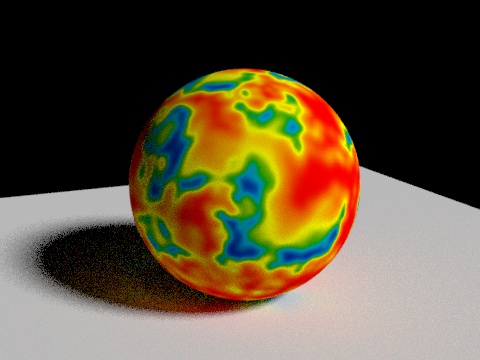
8. Now we just need to link the Color output of the Color Ramp to the Color input of a shader node such as a Diffuse BSDF node in the editor and the rendered result should look like this:
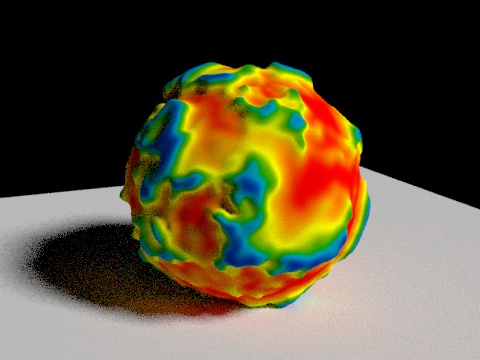
9. We can do a little more with this. If we add another Color Ramp node and leave the gradient at the default, then link the Fac output of the Attribute node to the Fac input of the new Color Ramp, we can then link the Color output of the Color Ramp directly to the Displacement input of the Output node. This will give this result:
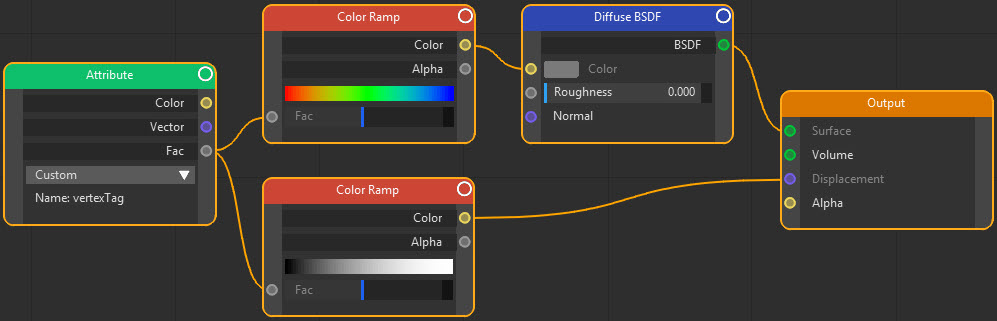
Hopefully this will give you an idea of just how powerful attributes in Cycles 4D can be. For reference, the final node tree looks like this:
Speeding up the workflow
In the above example, it was necessary to add an attribute tag, create the attribute, add an attribute node and assign the attribute name to the node.
You can now drag and drop a tag (in the above example, the vertex map tag) directly into the node editor. If you do this, the following steps are done automatically:
- an attribute tag is added to the object
- a new attribute is added to the attribute tag and the correct tag assigned to that attribute
- a new attribute node is created in the node editor and the attribute name assigned to that tag
Effectively, this carries out steps 2-6 inclusive from the above tutorial for you, which is clearly much faster.
This process works with these Cinema 4D tags:
- Normal
- UVW
- Polygon selection
- Point selection
- Edge selection
- Vertex map
- Vertex color
- Texture
- Stick texture
And with the following X-Particles tags:
- Skinner
- Wet Map
- Trail Thickness