How To: Use Image-Based Lighting
Setting up a scene to be lit completely or partially by an image is very simple but there are a few steps to carry out. This short tutorial shows how to set p this kind of lighting.
There are two ways to do this, the conventional way using a background material and an Environment Texture node, or the fast way by using the cyEnvironment object directly.
The Conventional Method
1. Add a cyEnvironment object to the scene.
The cyEnvironment object is essential if you want to light a scene with an image. Simply click on it from the Cycles 4D main menu to create one.
This will create a cyEnvironment object and a background material complete with an Environment Texture node ready for editing.
2. Create a Background material
For lighting a scene with an image, you can't use an Object or Light material. It has to be a special Background material which you can find in the Cycles 4D material list.
However, you don't normally have to do this because when you create a cyEnvironment object, Cycles 4D will automatically create a Background material for you. If you delete that material simply create a new one from the material manager, Create->Cycles 4D->Background Material. The new material is a plain background material with no additional nodes, so you would need to add the Environment Texture manually.
3 .Edit the node tree of the Background material
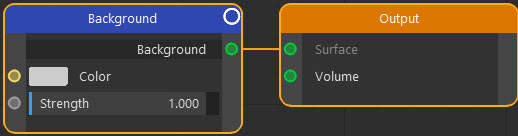
By default a new Background material looks like this:
To light the scene, you need to create an Environment Texture node and link it to the Color input of the Background Shader node:
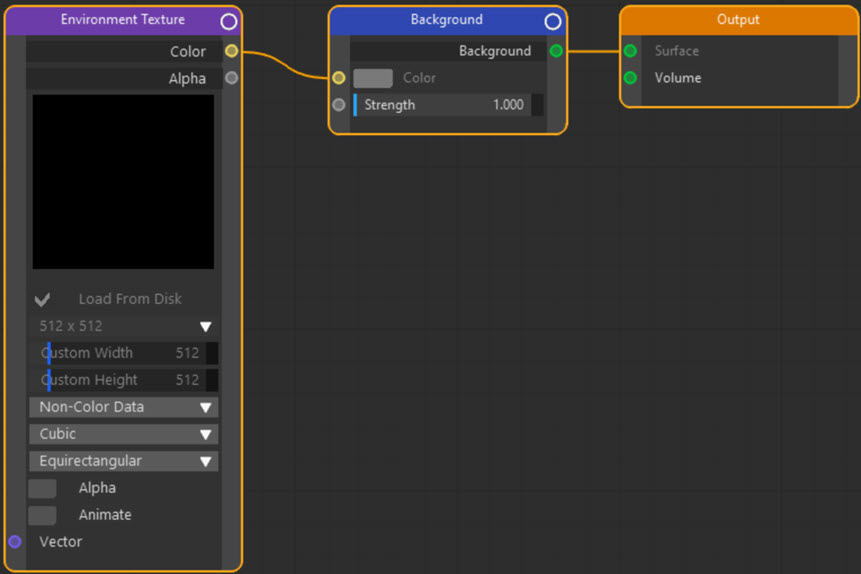
This is how the material as it would look if you added a new cyEnvironment object, because Cycles 4D will automatically add the Environment Texture node for you.
4. Edit the Environment Texture node
At this point, the background material - and therefore your scene - will be a lurid magenta colour. This is to point out that you need to add a bitmap or shader to the Environment Texture node to achieve the desired lighting in the scene.
For image-based lighting the most important thing to do is to add an HDR image to the node. You can add the image in the usual way in the 'Texture' link field in the right-hand pane of the node editor. Simply select the image you want to use.
Depending on the HDR you use, you may also need to change the HDR texture projection from Equirectangular to Mirror Ball. This is entirely dependent on the method used to make the HDR image.
You don't need to change anything else.
5. Apply the Background material to the cyEnvironment object
This is normally done for you when creating the cyEnvironment object but if you create a new Background material you will have to do this manually.
At this point the scene will be lit by your image. If all you get is black, or a very dark image, you will need to increase the Strength value in the Background node. This increases the light generated by the image.
Using the cyEnvironment Object Directly
In the cyEnvironment object load an HDR image here:
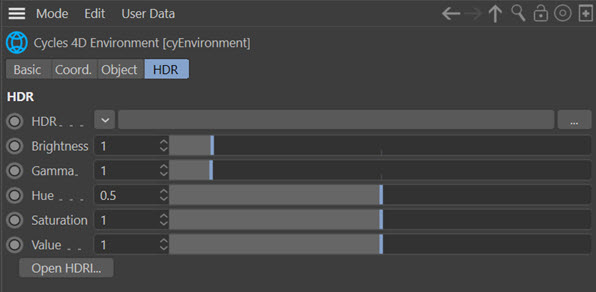
You can use the conventional button with three dots to load an HDRI from the file system or use the inbuilt HDRI browser (see the cyEnvironment object for details). If you load a valid HDR image, it will automatically add the HDRI to the Environment Texture node for you. This is significantly faster than using the node editor.