Object Tag
This tag is the Cycles 4D equivalent of the Cinema compositing tag. It has three tabs:
Object Compositing Settings tab
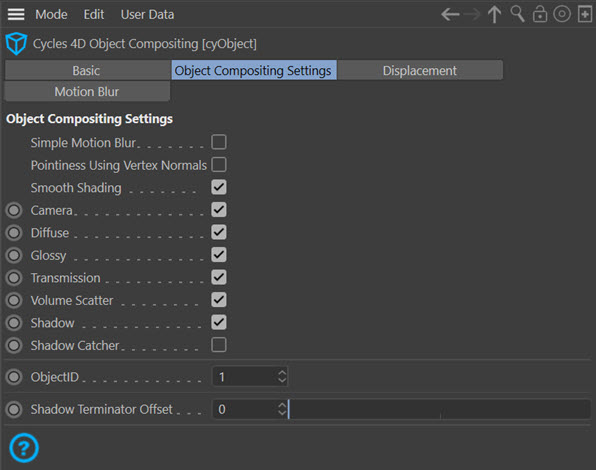
Simple Motion Blur
Check this switch to enable simple motion blur. This is a faster motion blur method which only uses the object's matrix to determine if it has moved.
Pointiness Using Vertex Normals
In the Geometry node, there is an output port called 'Pointiness' - see the node page for details. This calculates an average vertex normal by averaging the normals of neighbouring polygons. However, sometimes custom vertex normals are used on an object, as with a Normals tag or phong breaks. If this switch is enabled, those custom normals are used instead of the average normal.
Smooth Shading
This is analogous to Cinema's phong tag. Look at this example:
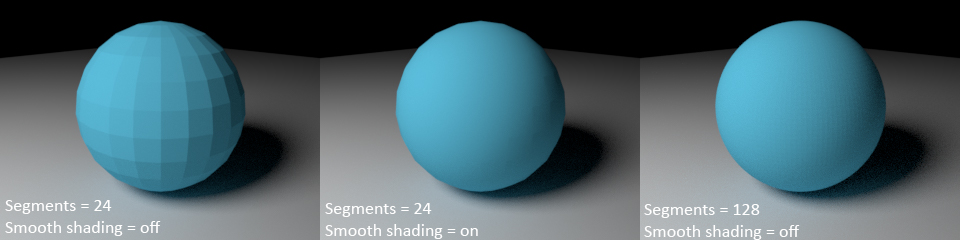
In the left-hand pane, the sphere has 24 segments and smooth shading is off. Note the very obvious faceting of the polygons. In the middle pane the segments are unchanged but smooth shading is on. If smooth shading is off, you can still obtain a smooth sphere by increasing the segment count, as in the right-hand pane. But if you look very closely you can see some very faint and subtle faceting even with 128 segments.
For this reason, attaching a cyObject tag to all mesh objects is probably a good habit to adopt.
Ray Visibility
The next six switches allow you to disable certain ray types from light rays which interact with this object. They are analogous to similar switches seen elsewhere in Cycles 4D, such as the Light tag and Environment object. The object tag allows you to disable ray types for a specific object. In summary this is what they do if disabled:
| Ray Type | Effect if Disabled |
|---|---|
| Camera | Object is no longer rendered but light is still reflected from it and refracted through it, and it continues to cast shadows |
| Diffuse | Only direct lighting is visible so the object no longer contributes to indirect lighting |
| Glossy | Reflections of the object are no longer visible in other objects |
| Transmission | No refraction or sub-surface scattering is visible |
| Volume Scatter | Objects will not see ray bounces from an object with a volume scattering material applied |
| Shadow | The object does not cast shadows |
| Shadow Catcher | See below for details |
Shadow Catcher
If this switch is checked, the object will not be rendered but will still catch any shadows cast on it, and those shadows will be rendered.
Object ID
A numeric value you can set to anything you like. The object ID is returned by the Object Info node, and can be used to render separate mask layers by turning on 'Object IDs' in the render elements tab of the render settings.
The lowest possible value is 1.
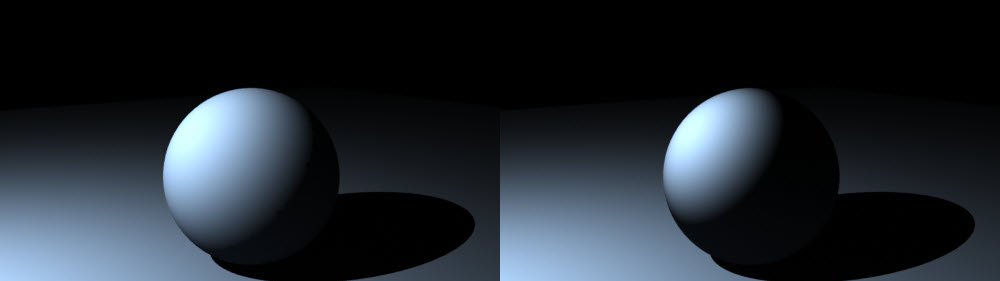
Shadow Terminator Offset
 This setting enables the shadow terminator position to be changed. In this example, the offset is set to zero (the default) on the left and to 0.5 on the right:
Displacement tab
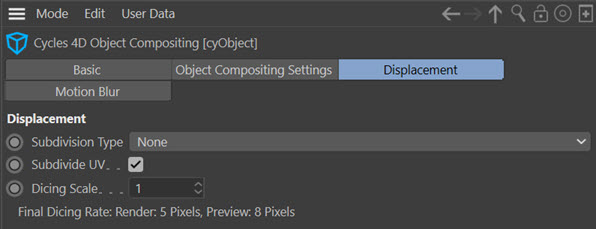
The options on this tab are used to implement micro-poly displacement, the Cycles equivalent of Cinema's sub-polygon displacement. If you need displacement but don't need micro-poly displacement, you can ignore these settings.
For details on how to use displacement in Cycles 4D, please see the page How-To: Use Displacement.
Subdivision Type
A drop-down menu with three options.
None
Micropolygon displacement is not active for this object.
Linear & Catmull-Clark
The algorithm to use. Both will automatically turn on adaptive subdivisions - there is no separate control for this as there is in Blender.
Subdivide UVs
If checked, the object's UVs are also subdivided. Normally you would leave this checked.
Dicing Scale
This value is used to multiply the subdivision rate (in both the final render and the preview render) for this object only. Please see the page How-To: Use Displacement for more information.
Motion Blur tab
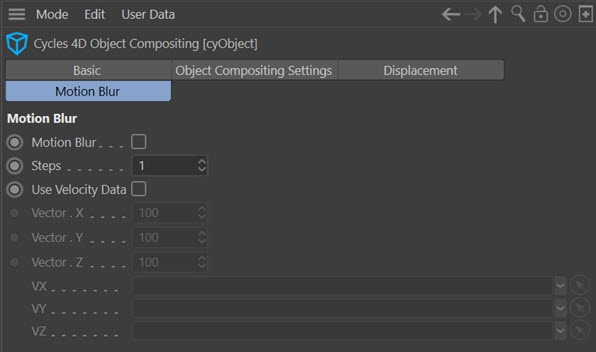
Cycles 4D allows you to turn on motion blur for all objects in the scene in the render settings. If you only want motion blur on a specific object, leave the Affect All Objects switch in the render settings unchecked and use this tab to turn motion blur on for the desired object.
See also the motion blur section in the Camera tag.
Motion Blur
Check this switch to enable motion blur for this object.
Steps
Increasing this value will render the motion blur more accurately but will use more memory. The default value is 1.
Use Velocity Data
If this switch is checked, you can generate motion blur from an X-Particles OpenVDB mesh. Prior to this, motion blur could not be generated on this object due to the change in vertex count each frame.
To do this, you first need to generate transfer velocity vertex maps in the OpenVDB mesher in X-Particles like so:
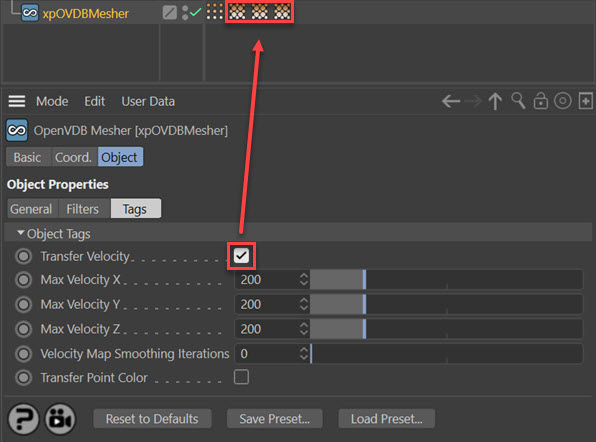
Then drag the three vertex tags into the correct fields in the cyObject tag:

Vector.X, Vector.Y, Vector.Z
These values control the amount of blur along the X, Y and Z axes. The higher the value, the greater the blur.
VX, VW, VZ
The three link fields for the vertex tags from the OpenVDB mesher.