Cycles 4D Environment Object
The cyEnvironment object is what Blender calls the World environment. It provides the facility for adding backgrounds and emitting light to light the scene, usually by using a Background material with an HDR image.
When you create a cyEnvironment object, a Background material is also created and applied to the object. This material will contain an Environment Texture node and you can add an HDRI image to that to generate light in the scene.
In the preferences, you can specify a default HDRI file to load into the texture node. When you first use Cycles 4D, this setting is empty, so it is recommended that you supply a default file in the preferences so there is at least some light when the scene is rendered. You can easily change the HDR used once the cyEnvironment is created.
Interface
There are two tabs in the cyEnvironment interface:
Parameters
Object tab

Mist Pass
These options are only used if the Mist switch is checked in the Render Elements tab of the Cycles 4D render settings. For details of how to generate a mist pass, see the page How To: Generate a Mist Pass.
Start
The distance from the camera where the mist starts to affect objects in the scene.
Depth
The mist is at maximum effect at this depth from the starting distance. In other words, if Start is 500 and Depth is 1000, the maximum mist effect is seen at a distance of 1500.
Falloff
These options control how rapidly the mist effect develops from the Start to the Depth distance. The default is Quadratic; Linear will fall off faster and Inverse Quadratic faster still.
 These options have no effect on the background. The background is assumed to be at an infinite distance so the mist always has the maximum effect at that distance. A mist in the real world will cause light to be diffused so the light will appear to be brighter in the mist, and therefore the background will be obscured by the mist and also be made brighter.
Ray Visibility
This section allows you to turn off certain rays for the cyEnvironment object. It's important to realise that you are not turning off these rays for the whole scene but specifically for the environment object. See this example for the effects:
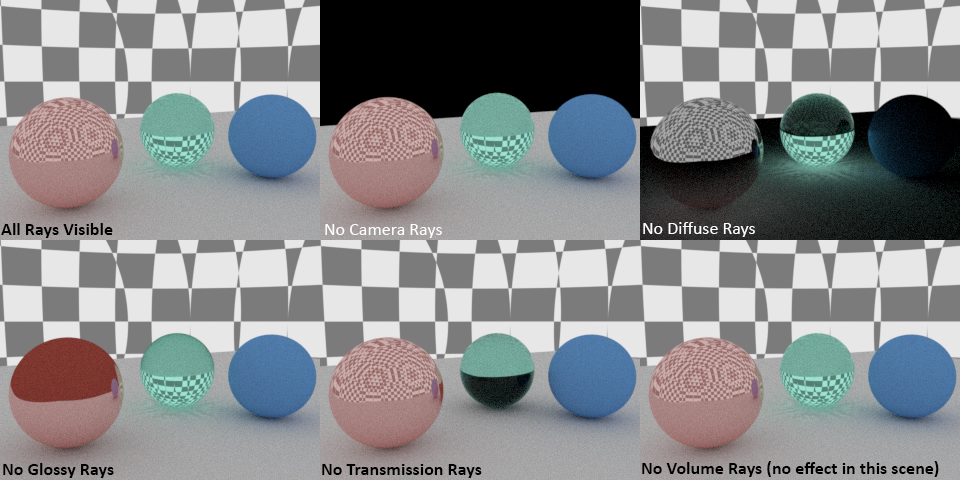
In this scene there are three spheres with a glossy, glass, and diffuse material applied to them from left to right. The scene is lit only by the cyEnvironment object; there are no other lights.
When camera rays are turned off, the background is no longer visible but it still appears in reflections and refractions, and still lights the scene. If diffuse rays are disabled, the background is visible but no longer contributes to direct lighting; there is still indirect lighting from light bouncing off or transmitted through the various objects.
If glossy rays are turned off, the background does not appear in reflections. Note that it is visible in the sphere with the glass material, because those are transmitted rays, not glossy rays. If the transmission rays are disabled, the background appears in reflections but not when refracted. Finally, turning off volume rays has no effect in this scene because the cyEnvironment object does not have a volume shader applied to it.
How to show the background without adding light from it
The problem with using a cyEnvironment object is that by default it will add light to the scene. Suppose you want to see the background without adding light? This is very easy. Just uncheck all the switches in the ray visibility section apart from camera rays. Then the camera will see the background but the background will not contribute to the scene lighting.
Surface
These options affect how the texture is sampled to light the scene. Most of the time you can leave these options at their defaults.
Multiple Importance Sampling
In general, leave this switch enabled if you are using an image map or a texture applied to the environment object, as it results in less noisy images for the same number of samples.
Auto Sampling
 If this switch is checked, the map resolution is set automatically. If it is disabled, the map resolution can be set to a custom value in the 'Map Resolution' field.
Note that if the 'Multiple Importance Sampling' switch is turned off, and 'Auto Sampling' is turned on, an importance map will be generated for this cyEnvironment object (which is in effect a background light).
Map Resolution
This is the size of the map used when sampling the background texture. If you increase the size of the map, the image may render a little slower but clearing noise will be faster.
Max Bounces
This is the maximum number of ray bounces from the lighting on the cyEnvironment object that will be used. You can try reducing this to reduce noise in the render if you are lighting the scene using a cyEnvironment object.
Editor
Texture Preview Size
If you apply a background material to the cyEnvironment object, the image from the material is then displaed in the viewport. The resolution of the image is set in this control. The higher the selected size, the less blurred the image will be in the viewport. This does not affect the rendered result, only the viewport appearance
Note that large sizes (1024 x 1024 and higher) will take several seconds to generate a bitmap for use in the viewport.
Volume
These options do the same for the cyEnvironment object as they do in the material settings. Please refer to those settings for more information.
HDRI tab
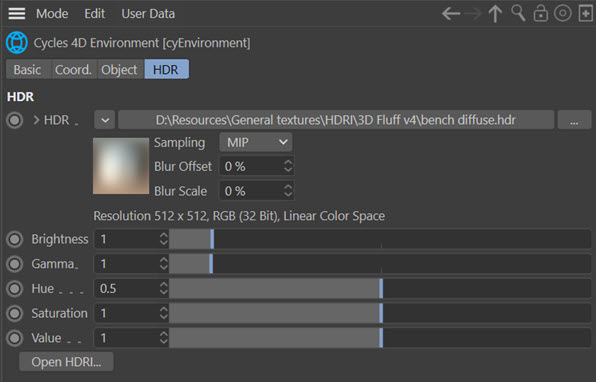
Using this tab makes it easy to assign an HDR image to the cyEnvironment object.
HDR
This is the image to use. You can select and load the file in the usual way.
What happens if you already have a Background material on the object which uses a different HDRI? The rule is as follows:
- If the cyEnviroment object has an HDRI in this link and you change the HDRI in the Environment Texture node, this link field is cleared
- If you have an Environment Texture node with an HDRI in it and you add an HDRI to this link field, the file in the node is changed to the one in this link field
In other words, you can only have one HDRI working on this object at any time.
Brightness
Increasing this value will increase the degree of illumination from the HDR image.
Gamma
You can use this control to adjust the gamma of the image.
Hue, Saturation and Value
These are the standard parameters for altering the colour and saturation of the image.
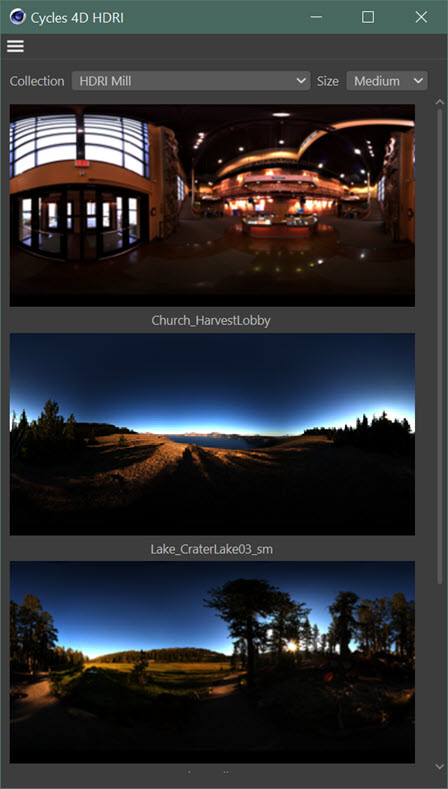
Open HDRI...
Clicking this button will open a dialog box showing smaller version of all HDRI files in a collection. The dialog might look something like this:
The collection location is specified in the Cycles 4D preferences. The 'Collection' menu will show all first-level sub-folders in the collection folder, like so:
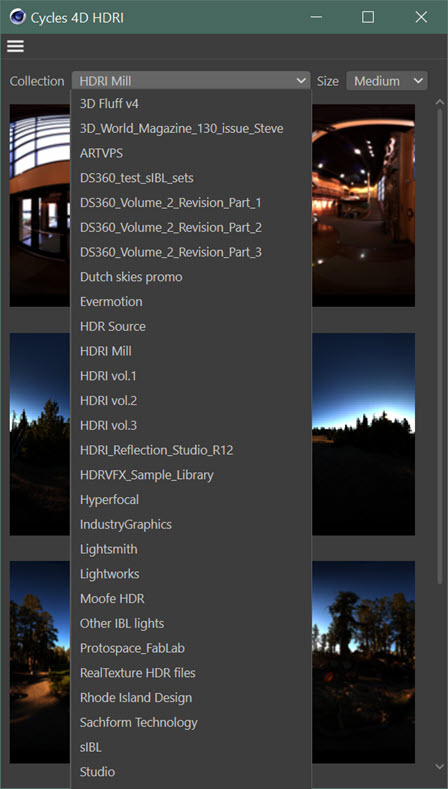
Of course, how many folders you see here will depend on your system.
If you click this button and no HDRI files are found in the collection folder, you will be invited to download and install our own starter pack of HDRI files for use with Cycles 4D. This is entirely optional and is not required.
You can change the size of the preview images using the 'Size' menu.