How To: Render Hair
Cinema4D's Hair works fine in Cycles 4D as long as you know how to set it up. These are the steps to follow:
1. Add Hair to an object in the usual way
Don't delete the hair material or the hair videopost effect in the render settings. You don't need to change anything there.
Note: if you change the type in the generate tab of the hair object to spline, you must add a cyCurve tag to the hair object, or no hair will render.
2. Create a Cycles 4D Object Material
In the node editor delete the Principled BSDF node and add a Hair BSDF node. Link its BSDF output port to the Surface port in the Output node.
3. Apply the new material to the Cinema 4D Hair object.
Don't apply this to the object the hair originates from, apply it to the hair object itself. Note that if a Cycles 4D material is not applied to the hair, the hair will not render.
4. Adjust the Hair BSDF node settings as desired
You can also edit the Cinema 4D Hair material to adjust such things as frizz, kink, clumping, etc. but the colour is controlled by the Hair BSDF material. In addition you can mix the Hair output with other Cycles shaders as desired.
Once you have followed these steps, the hair will render correctly.
You can do some additional things by using the Hair Info node. For example, to get a gradient along the hair, a node tree might look like this:
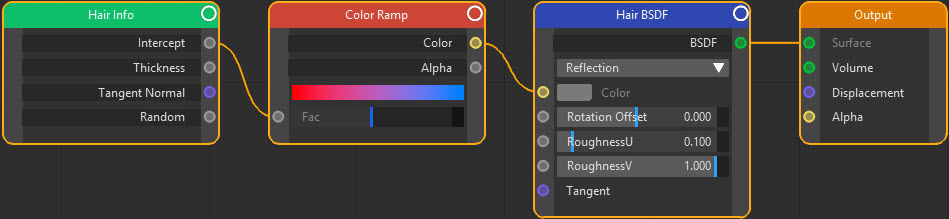
Giving this result:
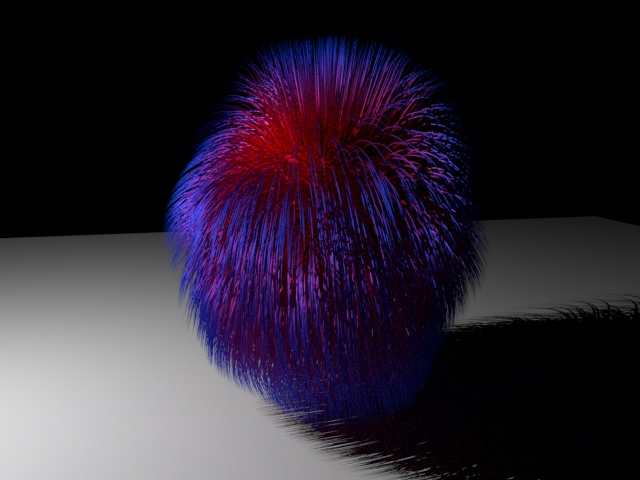
Here, the Intercept gradient is controlling the hair colour, but it could drive other parameters such as translucency if you mixed a Translucent BSDF node with the Hair BSDF node.
You can do the same thing with the Thickness output of the Hair Info node, but it seems it is necessary to increase the output thickness value very considerably to see any effect. The node tree would then look like this:

Click to enlarge image
In the Cinema 4D hair material the thickness values are the default 1 unit and 0.1 units for the root and tip, but using these values without adjustment in the node tree won't show any gradient effect .Once the value is scaled up by the Math node, we see this:
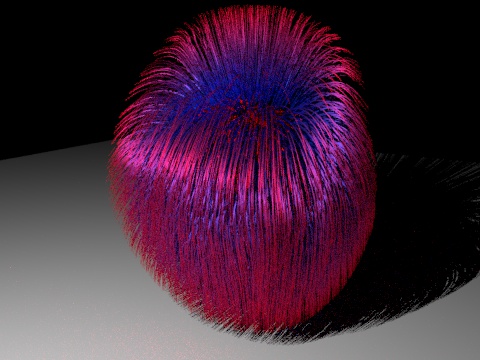
Note that the thinner part of the hair receives the colour to the left of the gradient.
