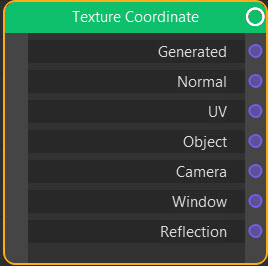
Input: Texture Coordinate
Node Interface
Overview
| Function | Allows you to set the coordinates to use for textures when applied to an object |
| Nearest C4D equivalent | Texture tag and move/scale/rotate tools in texture mode |
This node is a very important one because you can use it to change the way a texture is applied to a surface. It has a number of outputs but the ones you are most likely to use are the Generated, UV, or Object outputs.
The output is normally linked to the Vector input port of a texture node such as Image Texture, Checker Texture, etc.
Settings
None.
Output
All the outputs are vectors and provide the coordinates required to project the texture in that mode.
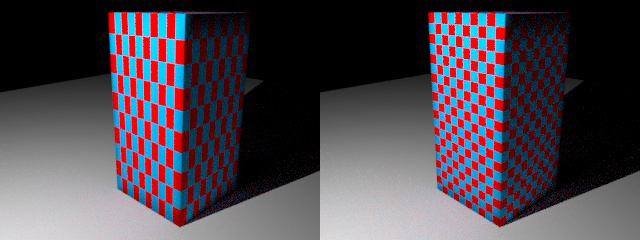
Generated
A really useful choice if the object is not UV-mapped. The node will then generate a set of best-guess coordinates for the texture. The disadvantage is that the result is not perfect, especially with complex models. Also, if the model is of very different sizes along the three axes you will see the texture stretched along that axis.
However, if you use a deformer of some kind on the mesh the texture will be preserved and not broken up, which is what will happen with the alternative mode - Object mode.
See the difference between Generated (on the left) and Object modes with a non-uniform model:
Normal
Outputs the surface normal of the point being rendered.
UV
Outputs the UV coordinates of a point if the object has them. If your model is UV-mapped and you want to apply a bitmap, this is the method to choose.
Object
The same as the Generated option except that the texture remains the same size (i.e. is not stretched) even if the object is not of a uniform size. See the example image under the Generated option. The downside of this method is that deforming an object will break up the texture.
Camera
Unlike the Object output, where the texture stays stuck to the object even if moves, with Camera output the texture is essentially stuck to the camera - it is projected from the camera onto the object. The texture then becomes dependent on the position of the rendered point relative to the camera, so moving the object or the camera will alter the textured appearance.
Window
With this method the texture appears to be stuck to the screen itself. Moving the object or camera does not move the texture but you will see different parts of the texture on the object, depending on where the object is in the viewport in relation to the screen.
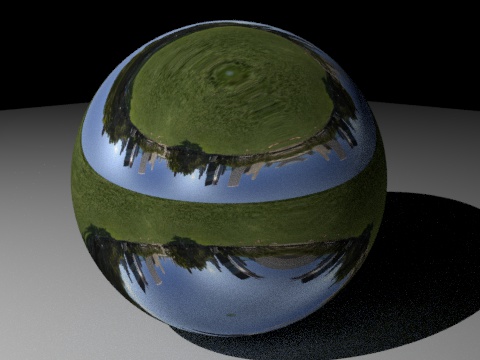
Reflection
Think of the object being enclosed by a sphere with the texture on the inside of the sphere. What you see on the object is a reflection of the texture on the sphere. The reason for this option is to let you create fake reflections rather than using real reflections from a cyEnvironment object, since these render much faster.
In this scene, the node tree uses this technique; note that there is no environment object in the scene, nor any glossy shader on the sphere - it's just a sphere with a bitmap texture and texture coordinate node set to Reflection: