How-To: Add Motion Blur
There are three ways to add motion blur to a scene when using Cycles. These are:
For these examples we will use a scene using a Mograph cloner with animated clones. You can download it here.
Many thanks to Bob Walmsley for providing the scene used in this example.
First steps
To render motion blur you will need to:
- have an animated object in the scene (fairly obviously!)
- add a camera, make it the active camera and add a cyCamera tag to it
- in the cyCamera tag, check the 'Motion Blur' switch; the other settings can be left at their defaults
- in the render settings, Settings tab, check the 'Motion Blur' switch
- finally, either:
- in the render settings, check the 'Affect All Objects' switch, which will apply motion blur to all objects in the scene
- or, add a cyObject tag to the objects to show motion blur, and in the tag's Motion Blur tab check the 'Motion Blur' switch
Note that if you leave 'Affect All Objects' in the render settings unchecked you must add a cyObject tag to all objects you want to see motion blur on, but the tag gives you extra control over the result.
Simple motion blur
This is the easiest way to add motion blur. Add a cyObject tag to the animated object, then in the tag simply check the switch 'Simple Motion Blur'. This is a very basic method and in the example scene produces no effect. This method is probably best ignored in most, if not all, cases.
Scene motion blur
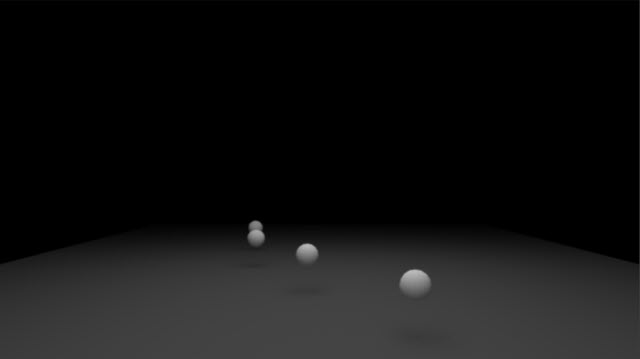
This is the conventional way to produce motion blur. In the example scene, the cyObject tag on the cloner has motion blur enabled in the Motion Blur tab, but all other settings are unchanged from the defaults. Likewise, motion blur has been enabled in the cyCamera tag and in the render settings. If you render the result, you can see some very nice motion blur on the cloned spheres. Here is frame 20 from the scene:
The problem with this method is that you can't do any more with it. Even if you enable multi-pass rendering and add post effects to the multi-pass, you don't get a separate motion blur pass, so you cannot change the end result. To do that, you need to use Object motion blur and composite the result in a compositing program such as After Effects.
Object motion blur
This section will only be of use if you have access to, and familiarity with, a compositor such as After Effects.
To use object motion blur, you only need to take two more steps. In the render settings, Render Elements tab, check the switch 'Object Motion'. That's actually all you need to do, but since you will be taking the render into a compositor, you will need to do some other things.
In the render settings, enable 'Multi-Pass' and add 'Post Effects' to the the multi-pass list. This will generate the object motion blur pass.
You may also need to be able to mask out the rendered objects in the compositor, so you could check 'Object IDs' in the render settings, Render Elements tab. This will give you additional layers for the objects with cyObject tags in the scene.
Finally, in the render settings, check 'Save' and in the Save tab, turn off saving the regular image (we don't need it) and turn on save for the multi-pass image. Very importantly, make sure the format is set to 'OpenEXR' and the depth to 32 bits per channel. Depending on your compositor you might also want to check 'Multi-Layer File' so that you get one file per frame with the passes in different layers, rather than one file per pass per frame.
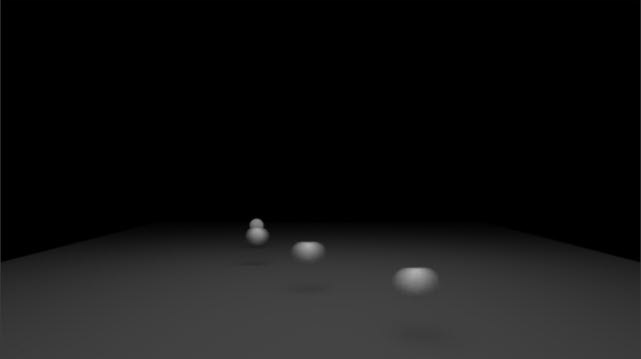
The reason for choosing OpenEXR will become apparent shortly. Now render the scene. If we look at frame 20 again, we see this:
Where is the motion blur? It's no longer rendered, instead it is in another layer in the multi-pass render. In the picture viewer Layer section, we can see this:
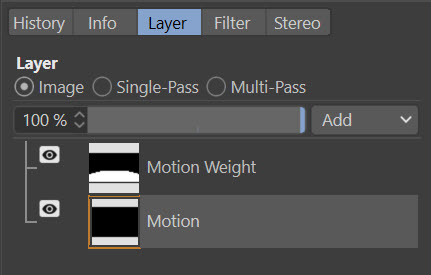
There are two layers - 'Motion' and 'Motion Weight'. The motion weight layer can be ignored, this is an object buffer to be used in conjunction with the 'Motion' layer in post-production. We don't need the motion weight, it is the motion layer that we need. If you look specifically at this layer, you will see that it seems to be pure black with nothing in it. In fact, there is data in it but you can't see it. This is a render, so the data is colour data but at ranges well outside those of a normal RGB image. You see now why the file format must be OpenEXR - even a 32-bit TIF file can't handle these ranges.
To use the layer and finally see some motion blur you would need to import the file into a program such as After Effects, extract the Motion layer and manipulate it to achieve the effect you want, but this is beyond the scope of this example.
Summary
Which method to use? We can sum them up like this:
| Method | Pros | Cons |
|---|---|---|
| Simple motion blur | Easy to set up and fast to render | Results are generally not very good |
| Scene motion blur | Faster to render than object motion blur Good results visible in the picture viewer Full 3D motion blur |
No motion blur pass so impossible to change or manipulate later |
| Object motion blur | Produces a multi-pass result which can be extensively changed in a compositor | 2D motion blur, so may occasionally have problems with overlapping objects and with rotating objects |