Input: Attribute
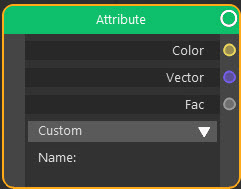
Node Interface
Example Output
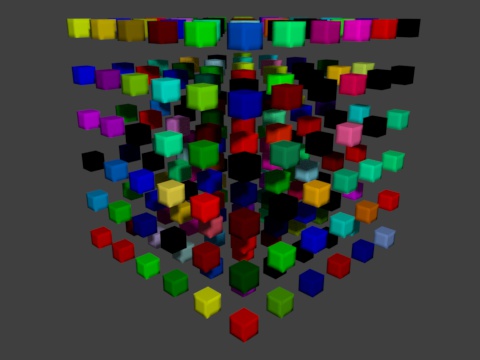
This scene uses a Mograph cloner and a Random effector to change the object colour. An attribute node with the Object Color preset selected is used to retrieve each clone's colour and pipe it to the Diffuse BSDF tag, as shown here:
Overview
| Function | Outputs data from data specified by a preset attribute or be a cyAttribute Tag |
| Nearest C4D equivalent | None |
This node allows access to data not available to Cycles 4D through the other nodes. This can be via a user-selected preset or via the Cycles 4D cyAttribute Tag.
The use of presets is shown in the above example. The best way to understand how it works when using the cyAttributes tag is by an example, which can be found here.
Settings
Note: a * symbol next to the name indicates the parameter also has an input port. A # symbol indicates that the parameter can only be changed with an input node, not in the node itself.
Preset
This is a list of preset attribute values. If you choose one of these other than Custom, a cyAttribute tag on the object is not required and you don't need to enter anything for the Name. If you choose Custom, then a cyAttribute tag on the object is required, as shown in the tag example.
The currently available presets are:
Custom
The default setting, which requires a cyAttribute tag on the object and a named attribute to use.
The node can use a variety of inputs including:
- Object normals
- Object UVW map
- Polygon selection
- Point selection
- Edge selection
- Vertex map
- Vertex colour
- Texture
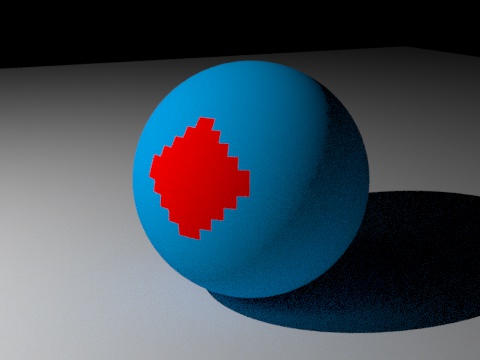
For example, in this scene the sphere has a polygon selection tag named 'polysel'. It also has a cyAttribute tag with an attribute named 'polysel' and the selection tag dragged into its Tag field. The selection has a red Diffuse BSDF shader applied to it, while the rest of the sphere has a blue shader:
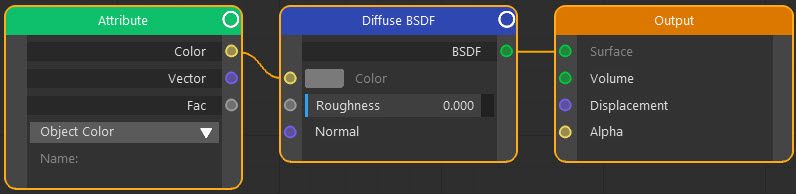
The node tree is built like this:
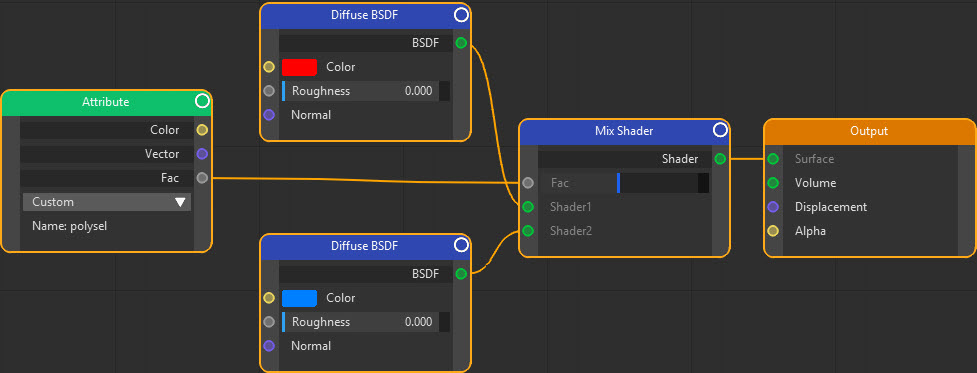
Note that the Attribute node is set to Custom and given the Name 'polysel' to match the name in the cyAttribute tag. The node then takes the selection and outputs 0 if the shaded point is not in the selected polygons and 1 if it is. This is then used to drive the Fac value of a Mix shader.
You can also use the standard named selections available in objects such as Lathe, Extrude, etc. These have names such as C1 for the first cap, C2 for the second cap, and so on. See the Cinema 4D help for more details. To use these simply create a cyAttribute tag and add an attribute named C1 or whatever it is you need.
 Be aware that these named selections are case-sensitive (i,e, it must be C1 not c1).
Object Color
This is the object's colour - that is, the 'Display Color' as given in the object's Basic tab in the Cinema 4D attribute manager. Note that in the example output shown above, all Mograph does is change the cloned object's Display Color setting.
X-Particles presets
The remaining presets are all for use with X-Particles. They are:
Skinner
The X-Particles skinner shader cannot be used in Cycles 4D so this is how to achieve the same effect. It requires a Skinner object and an object material applied to it, with an attribute node using the Skinner preset. In this example, the particle colour is set to random:

Trail
With this preset, the X-Particle trails will take their thickness and colour from the trail data. An example of how this works is shown in the page dealing with rendering trails, in the section 'Driving materials with particle data'.
Wet
Wet maps in X-Particles need a special shader which cannot be used in Cycles 4D. This preset can be used to generate wet maps when using Cycles 4D.
Name
The name of the attribute to use, as given in the cyAttribute tag.
Output
Color
A colour output from colour data in the tag.
Vector
A vector output from vector data in the tag.
Fac
A numeric output from numeric data in the tag.