Fused FAQ
What is INSYDIUM Fused?
INSYDIUM Fused provides access to the full INSYDIUM Fused Collection, including Plugins and Library Assets. See below for a full list of included items:
- X-Particles
- NeXus
- Taiao
- TerraformFX
- MeshTools
- Jidou
- Library Assets
- Access to historic builds
What if I don't want to purchase all of the items included with INSYDIUM Fused?
INSYDIUM Fused Create License
If you're only interested in a specific part of our software, you can now select individual elements of the INSYDIUM Fused collection with the INSYDIUM Fused Create license. If you later decide to expand your INSYDIUM collection, simply return to the INSYDIUM Shop and select another element to add to your existing license. Please note that this may be version dependent.
What if I don’t want to download all parts of INSYDIUM Fused?
INSYDIUM Fused Plugins are provided as a collection and downloadable in one installation package. You can also choose which of the Library Assets to download separately via your Customer Account.
Please note that the Library Asset files require a large amount of free disk space.
How do I install INSYDIUM Fused?
Every INSYDIUM Fused license is individually signed and registered to its owner on downloading from your Customer Account after purchase. This information is encoded into INSYDIUM Fused. Your Customer Account stores your personal download and it should not be shared with anyone else.
If you have INSYDIUM Fused installed in Cinema 4D and have the Online Updater enabled (with an internet connection), you will always receive the latest version of INSYDIUM Fused available for your license.
Please note that if you have a perpetual license that is out of Maintenance, the download will only include X-Particles.
If you experience any installation issues while following the below guides, please contact our Customer Services team.
Select your Operating System below to see the installation instructions:
Windows
Please follow the video installation guide below for comprehensive instructions on how to install INSYDIUM Fused within Cinema 4D on your Windows system:
If INSYDIUM Fused does not load within Cinema 4D after following these instructions, ensure that your Builds are compatible with the Cinema 4D version you are using and that the necessary Visual Studio redistributable files have been installed.
MacOS
Please follow the video installation guide below for comprehensive instructions on how to install INSYDIUM Fused within Cinema 4D on your MacOS system:
If you do not wish to click through the security prompts individually, there is an alternative installation method using Terminal.
Please note that you use this installation method at your own risk and we recommend the method highlighted in the above video.
To bypass the security prompts, place the INSYDIUM folder within the Cinema 4D Preferences > Plugins location as normal and then enter the below command in Terminal:
xattr -r -d com.apple.quarantine <INSYDIUM Fused Folder path>
Replacing the <INSYDIUM Fused Folder path> with the path to the INSYDIUM folder.
Once the command has been executed, you should not see any of the expected security prompts when opening Cinema 4D and be able to enter your license information.
Please note that if the above does not work and you see ‘permission denied’ messages after executing the command, you may need to preface this with ‘sudo’ as below:
sudo xattr -r -d com.apple.quarantine <INSYDIUM Fused Folder path>
What is MeshTools?
MeshTools is a suite of powerful procedural modeling tools to affect geometry and generate splines.
See our MeshTools product page for more information.
What is TerraformFX?
TerraformFX is a powerful, art-directable terrain generator that allows users to build highly customizable landscapes.
See our TerraformFX product page for more information.
How do I upgrade to the latest build?
Updating Your INSYDIUM Fused License
If your license is eligible, the latest version of INSYDIUM Fused will be available to you. You can update your INSYDIUM Fused plugins automatically through Cinema 4D or by downloading the latest version manually from your Customer Account.
Automatic Update through Cinema 4D
If you attempt to update your plugin through Cinema 4D and receive the following error message:
"Unable to write to the INSYDIUM Fused folder. Please ensure the plugin is located in the correct plugins folder. Please see the manual for more information."
it indicates that your plugin is installed in an incorrect location, such as Program Files (Windows) or Applications (macOS), rather than in the Cinema 4D Preferences. This error occurs for security reasons, as both Windows and macOS place access restrictions on these folders.
To resolve this, please refer to the video instructions linked above to move your plugin to the correct folder and try again.
Manual Update through Customer Account
If you opt to download the new build through your Customer Account, you can install it as usual by following our installation instructions.
Troubleshooting Update Issues
If the update still doesn't work through Cinema 4D after moving the plugin to the correct location, please remove your current installation and download the new build from your Customer Account. Follow the video instructions linked above for proper installation.
Note: Automatically updated builds are only available for licenses with Maintenance or an active Subscription. If you have a Complete or Create license, you will need to purchase an Upgrade to gain access to the latest version.
INSYDIUM Fused Cinema 4D Compatibility
INSYDIUM Fused Cinema 4D Compatibility
| Build/Version | Compatibility | Release Date |
| Build 1882 (Version 2025.4.2) | Cinema 4D R19–2026 | April 2026 |
| Build 1875 (Version 2025.4.1) | Cinema 4D R19–2026 | February 2026 |
| Build 1856 (Version 2025.4) | Cinema 4D R19–2026 | December 2025 |
| Build 1680 (Version 2024.4.1) | Cinema 4D R19–2026 | March 2025 |
| Build 1674 (Version 2024.4) | Cinema 4D R19–2025 | February 2025 |
| Build 1666 (Version 2024.3) | Cinema 4D R19–2025 | September 2024 |
| Build 1658 (Version 2024.2) | Cinema 4D R19–2024 | May 2024 |
| Build 1563 (Version 2023.3.1) | Cinema 4D R19–2024 | September 2023 |
| Build 1557 (Version 2023.3) | Cinema 4D R19–2023 | July 2023 |
| Build 1493 | Cinema 4D R19–2023 | April 2023 |
| Build 1492 | Cinema 4D R19–2023 | January 2023 |
| Build 1489 | Cinema 4D R19–2023 | December 2022 |
| Build 1484 | Cinema 4D R19–2023 | October 2022 |
| Build 1480 | Cinema 4D R19–2023 | September 2022 |
| Build 1260 | Cinema 4D R19–S26 | June 2022 |
| Build 1253 | Cinema 4D R19–S26 | April 2022 |
| Build 1250 | Cinema 4D R19–R25 | March 2022 |
| Build 1036 | Cinema 4D R19–R25 | September 2021 |
| Build 1034 | Cinema 4D R19–R25 | September 2021 |
| Build 1030 | Cinema 4D R19–S24 | July 2021 |
| Build 895 | Cinema 4D R14–S24 | September 2020 |
| Build 884 | Cinema 4D R14–S22 | July 2020 |
| Build 742 | Cinema 4D R14–R21 | January 2020 |
| Build 732 | Cinema 4D R14–R21 | September 2019 |
| Build 728 | Cinema 4D R14–R20 | July 2019 |
| Build 724 | Cinema 4D R14–R20 | July 2019 |
| Build 642 | Cinema 4D R14–R20 | October 2018 |
| Build 535 | Cinema 4D R14–R20 | December 2017 |
I’ve found a bug in INSYDIUM Fused, how do I report it?
The Bug Reporter can be found within the INSYDIUM Menu in Cinema 4D.
Please ensure that as much information as possible is included in the Bug Report, including steps to recreate the issue and also attach a relevant scene file.
Please note that you will receive an automatic email once the Bug Report has been submitted and we will only contact you further if more information is required.
INSYDIUM Fused licensing messages
There are a number of reasons INSYDIUM Fused may not work and more information on the most common problems can be viewed by clicking the relevant option.
If your issue is not listed below or the information has not resolved your issue, please contact Customer Services for further advice.
License entered is incorrect error message
SSL Cert Chain Invalid error message
License Entered Is Invalid error message
This Is Not a Valid License error message
Your INSYDIUM License Cannot Be Verified error message
License entered is incorrect error message
This is a security check. When you enter your email address and license into INSYDIUM Fused, it must match the information on our system. If you enter your email or license incorrectly, you will see an error message asking you to correct it.
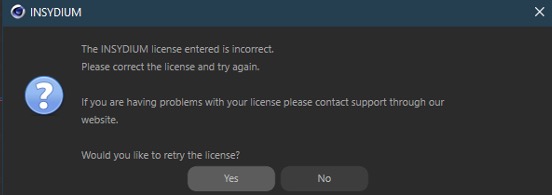
If the license information entered is correct and you see the above error message, there are two other reasons this may occur:
1. No internet connection
Your system is not connected to the internet and as such, the license cannot be verified.
2. Connection Error
Your system may not be able to contact our License Server for verification and this is likely due to restrictive internet security or firewall settings. The URL and Port information for our License Server is below and you will need to whitelist these to allow the connection:
INSYDIUM Fused

https://license.insydium.net

port 443 (https connection)
Please note that as each internet security and firewall system is different, our Support Team are unable to provide specific advice as to how to resolve the above and you will need to contact the provider directly.
License Entered Is Invalid error message
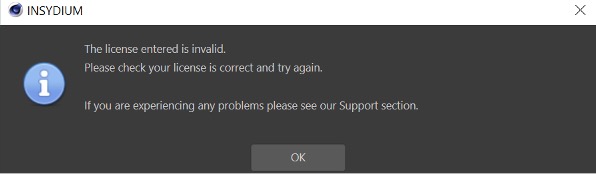
This error message means that the license has been entered in the correct format but is incorrect.
Please check the license to ensure that it has been entered exactly as shown within your Customer Account and ensure that no spaces have been entered at the beginning or end.
Your License Is Malformed error message
This error message means that the license input starts with the correct digits (IFL- for INSYDIUM Fused), but there is an error further along in the license chain.
Please check the license to ensure that it has been entered exactly as shown within your Customer Account.
This Is Not a Valid License error message
This error message means that the license entered is incorrect and does not start with the correct digits as below:
IFL – INSYDIUM Fused
XPL – X-Particles
CY4D – Cycles 4D
Please check the license to ensure that it has been entered exactly as shown within your Customer Account.
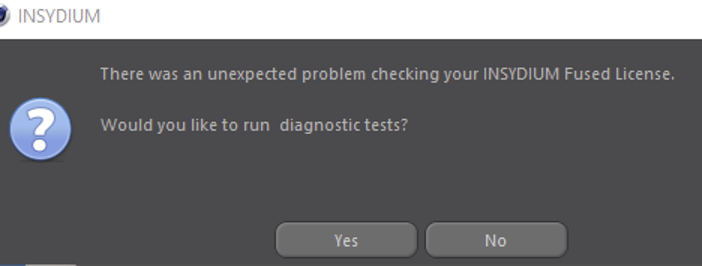
Your INSYDIUM License Cannot Be Verified error message
There are two reasons this error message may occur:
1. No internet connection
Your system is not connected to the internet and as such, the license cannot be verified.
2. Connection Error
Your system may not be able to contact our License Server for verification and this is likely due to restrictive internet security or firewall settings. The URL and Port information for our License Server is below and you will need to whitelist these to allow the connection:
INSYDIUM Fused

https://license.insydium.net

port 443 (https connection)
If the above has not worked and you are still seeing this error message, click No, and then OK on the license input dialog box that appears, to bring up the diagnostic tests below:
If you run the diagnostic tests and our License Server can be contacted, you should see that all tests have been passed:
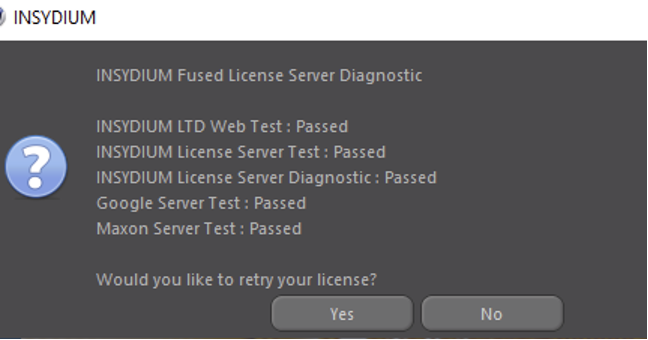
If any of the tests have failed, please contact Technical Support for further information.
Please note that as each internet security and firewall system is different, our Support Team are only able to provide basic advice and you may need to contact your provider directly.
SSL CERT Chain Invalid
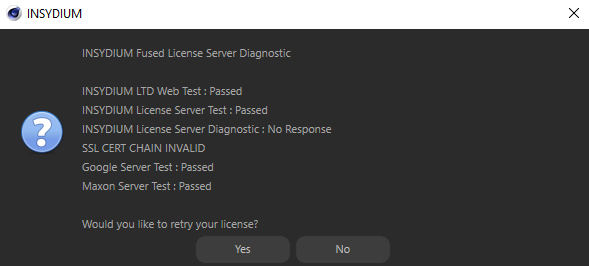
This is due to a missing security certificate on your machine.
To resolve this, check if the ISRG Root X1 certificate is installed. Open certmgr.msc, go to Trusted Root Certification Authorities > Certificates, and look for ISRG Root X1. If it is missing, you may need to install it from Let's Encrypt:
https://letsencrypt.org/certificates/
Once done, restart Windows and try activating the license again.
Is INSYDIUM Fused compatible with Cinema 4D Command Line rendering, including Deadline?
INSYDIUM Fused is compatible with command line rendering and has the capability to use unlimited render nodes.
If you are using command line rendering, you will see that each version of Cinema 4D has a second Preferences folder, marked with a "_x" suffix and you need to install INSYDIUM Fused within this folder, rather than the standard Cinema 4D Preferences folder.
You will also need to ensure that your system has an internet connection for licensing and your software download carries your license information encoded into it, so our license server will enable your software to run under CLR/TR/NET without the need to enter a license.
I use Command Line Render/Team Render/NET Render, do I need to buy render node licenses?
INSYDIUM Fused licenses allow unlimited render nodes, so you do not need to buy additional licenses. Install the software to each client and ensure they have an internet connection for licensing. Your software download carries your license information encoded into it, so our license server will enable your software to run under CLR/TR/NET without the need to enter a license for them.
For more information on using INSYDIUM Fused with Team Render, click here, or Command Line here.
Where can I find my Build number?
The Build numbers for each of your installed INSYDIUM Fused plugins can be found within Cinema 4D.
To access these, you will need to navigate to the INSYDIUM Menu > About INSYDIUM Fused… option.
How to remove INSYDIUM Fused
Removing your plugin is very straightforward.
- Go to your Cinema 4D application folder, open the Plugins folder and delete the INSYDIUM Fused folder.
- On macOS, this path may look like Applications/MAXON/CINEMA 4D [version]/plugins/INSYDIUMFused
- On Windows, this path may look like C:\Program Files\MAXON\CINEMA 4D [version]\plugins\INSYDIUMFused
- Now open Cinema 4D, go to the Edit menu and choose Preferences....
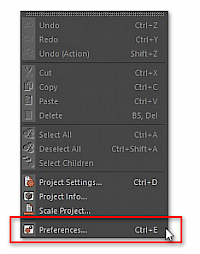
- Click Open Preferences Folder... at the bottom of the Preferences window.

- From the Preferences folder, open the Plugins folder and delete the INSYDIUM Fused folder within.
- Restart Cinema 4D and you will see that your plugin has been uninstalled.
Can I use my INSYDIUM Fused license offline?
INSYDIUM Fused 2024 and onwards requires an active internet connection to connect to our license server for authentication. This is necessary for the software to function properly and ensure valid licensing.
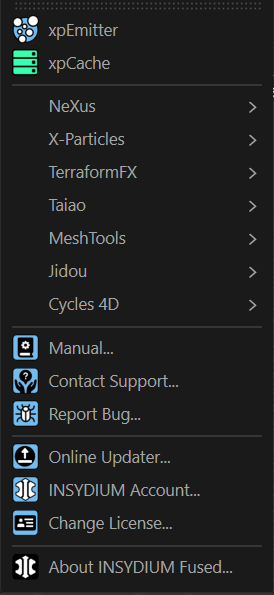
Where can I find INSYDIUM Fused Plugins in Cinema 4D?
All INSYDIUM Fused plugins can be accessed via the INSYDIUM Cinema 4D Menu:
How many computers can INSYDIUM Fused Plugins be installed on?
INSYDIUM Fused Plugins can be installed on as many systems as required, however, they can only be open on as many systems at a single time as license seats purchased, plus, if your license is eligible, the single additional seat.
For more information on managing your license, click here.
Is INSYDIUM Fused compatible with Apple M Series systems?
Yes, INSYDIUM Fused is natively compatible with Apple M Series systems in Cinema 4D R23 and later, except Cycles 4D, which cannot be used on these machines as it does not have silicon support.
Please click here if you are using an M2 system and INSYDIUM Fused is not loading.
TerraformFX is missing from Cinema 4D
TerraformFX is only compatible with the latest build available for each Cinema 4D version.
If you are unable to see TerraformFX in the INSYDIUM Menu, it is likely that you are not using the latest Cinema 4D build for your specific version and will need to update to resolve this issue.
The different INSYDIUM Fused licenses explained
Purchasing an INSYDIUM Fused License
When purchasing a new INSYDIUM Fused license, you can choose from three options: INSYDIUM Fused Complete, INSYDIUM Fused Create, or a Subscription.
INSYDIUM Fused Complete
Purchasing INSYDIUM Fused Complete gives you perpetual access to the full INSYDIUM Fused Collection. You will have access to the latest version released by the purchase date and all subsequent Service Updates for that release. To access future Release Updates, you can purchase the Complete Upgrade via your Customer Account, which provides access to the latest release and all service updates for that version.
If you purchased a perpetual license prior to July 2023, please click here for relevant information.
INSYDIUM Fused Create
Purchasing an INSYDIUM Fused Create license allows you to select which elements of the INSYDIUM Fused Collection you need, with perpetual access to the latest version of each as of the purchase date, along with all service updates for that release. If you wish to expand your Create license in the future, you can return to the Create product, enter your license, and select additional elements. Please note that adding new plugins to your license is version dependent and is not guaranteed.
Subscription
A subscription provides access to the entire INSYDIUM Fused Collection for the duration of your subscription period. This is an ideal option if you want ongoing access to the latest features and updates. For more details on subscription options, please click here.
What is an INSYDIUM Fused Subscription?
INSYDIUM Fused Subscription licenses are available on 3-month, 6-month and Annual terms.
A Subscription provides access to the full INSYDIUM Fused Collection for the duration of the term and once the initial term has ended, the subscription will automatically continue unless you cancel before the renewal date.
Benefits:
An INSYDIUM Fused Subscription gives you ultimate flexibility. You can use the license for as long as you pay the fee and cancel the subscription at any time.
INSYDIUM Fused Subscription licenses include:
- Updates
- Access to INSYDIUM plugins X-Particles, NeXus, Taiao, TerraformFX, MeshTools and Jidou
- Library Assets
- Access to historic builds
Please Note: In the event you cancel your subscription, reverse or fail to pay your subscription fee payment, the license and Fused benefits will be canceled.
How do I cancel my INSYDIUM Subscription?
Canceling your INSYDIUM Subscription is done through your Customer Account.
To cancel a Subscription, navigate to the ‘My Subscriptions’ tab in your Customer Account and click the Cancel button next to the relevant option.

Please note: In order to avoid the next subscription fee payment, you must cancel your INSYDIUM Subscription one day before your next payment is due to be collected. If you cancel after the payment has been taken, you will receive the following subscription term as your final term. There are no refunds for the days leading up to your subscription end date.
How do I access the Customer Account?
1. The Customer Account can be located under 'My Account' on the website after clicking on the Shop tab.

2. If you have previously made an account – you can log in here or via the Login option at the top right-hand side of each page (Be sure to use the email address your license is registered to.)

3. If you do not have a Customer Account, you will need to register as a new customer.
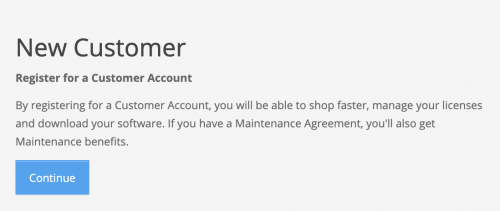
4. Fill in the form to register for your account.
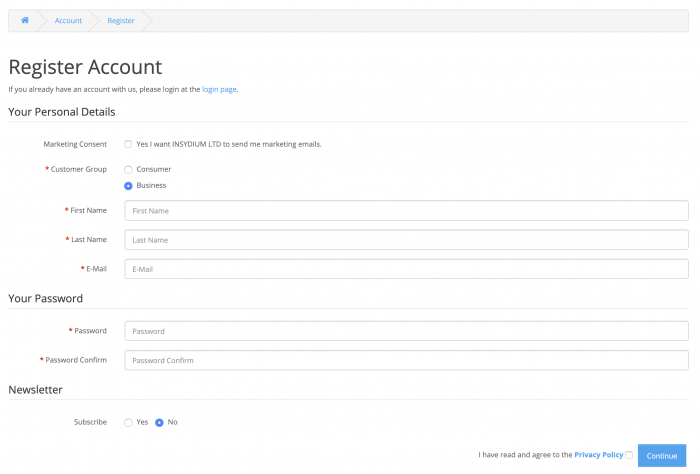
5. Continue to log in.
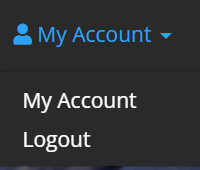
6. Log in when you need and navigate using the 'My Account' drop down.
How do I add my license to my Customer Account?
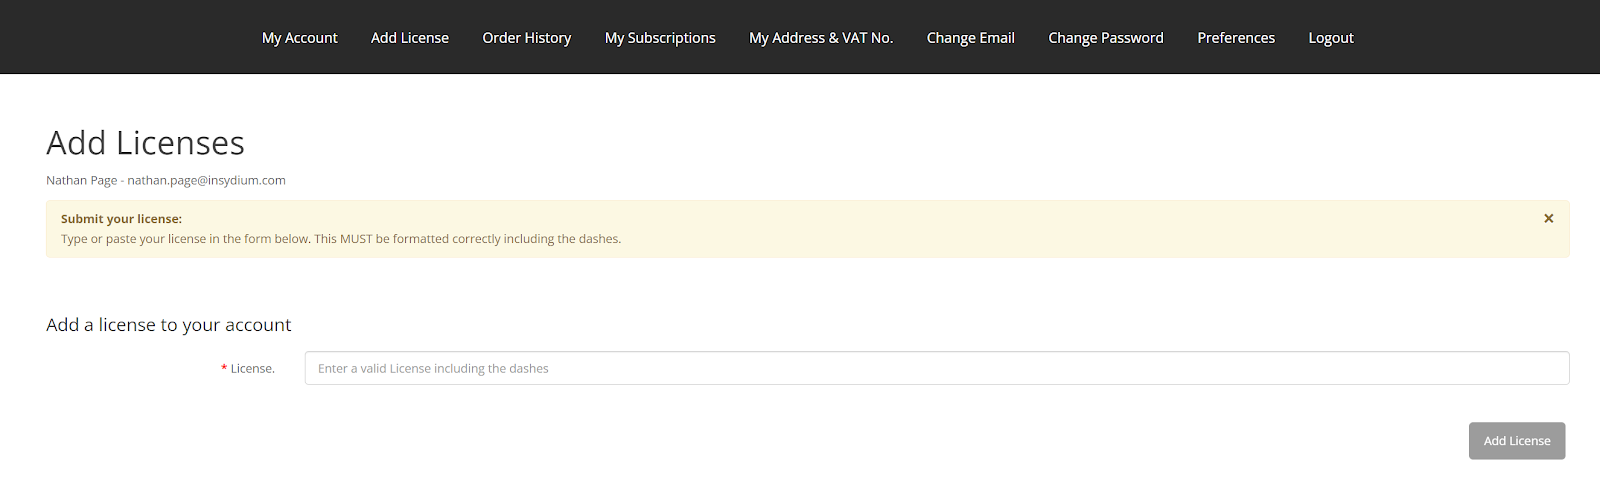
Log in to your Customer Account and click on the Add License button.
Add your license into the License field, including the dashes, then click the Add License button.
The license you enter must be registered to the same email address as your Customer Account.
I cannot see my license within my Customer Account
All licenses registered to a Customer Account are available via the ‘Choose your license’ drop-down box.
If your license was purchased using the same email address as the Customer Account but is not listed, you will need to add your license by following these instructions.
I have licenses registered to different addresses; can I see them all in the same Customer Account?
No. In order to add licenses, they must be registered to the same email address as your Customer Account.
How do I reset my license?
You can reset your license by clicking the ‘Reset’ button next to your license in your Customer Account.
There is a limit to the number of times you can reset your license and if we believe that the reset function is being abused, we will contact you directly for further information.
My email address is not recognized
You may not have a Customer Account. Your license is registered to a specific email address and you may need to create a Customer Account using the same email address that your license is registered to.
Can I change my email address?
Three changes to your email address are permitted for free through your Customer Account; subsequent changes incur a fee.
Please contact our Customer Services team if you need assistance changing your email address.
Which builds are supported by Technical Support?
Currently, Technical Support is available for Updates released within the last 2 years.
What is a perpetual license purchased before July 2023?
If you purchased a perpetual license prior to July 2023, it is likely that you bought the license with 12 months Maintenance.
This license gave you 12 months access to all INSYDIUM Fused Plugins, Updates and Library Assets.
If the Maintenance expires, you will retain access to X-Particles and lose access to the rest of the INSYDIUM Fused Collection.
To gain access to the full INSYDIUM Fused Collection for a further 12 months, you will need to purchase Maintenance via the INSYDIUM Shop.
Please note that if you purchase Maintenance after it has expired, this will affect the available X-Particles Build should your Maintenance lapse again in the future as this will revert to the last build released by the time of the first Maintenance lapse.
Alternatively, you can switch your license to INSYDIUM Fused Complete by purchasing the Complete Upgrade product. This will give you perpetual access to the latest INSYDIUM Fused version released at the time of purchase and all Service Updates for this release. This differs from Maintenance in that you retain the full INSYDIUM Fused Collection after 12 months, not just X-Particles. Once you have switched to a Complete license, Maintenance is no longer required and your license cannot be reverted.
For more information about Maintenance, click here.
Are Nodes considered entire workstations per GPU or per CPU?
A node/seat is considered to be per Cinema 4D/Team Render/CLR Client.
Can I have a refund?
A refund can be processed for an order if we are notified within 14 days of purchase.
To request a refund, contact our Customer Services team.
How to export X-Particles as an Alembic Point Object (via Thinking Particles)
1. Preparing the Scene
- Cache the scene's xpEmitter(s).
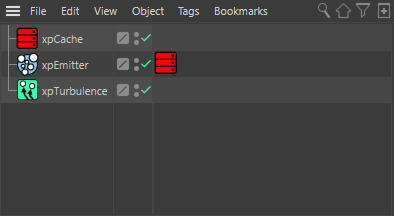
- In the xpEmitter(s), go to Emission > Thinking Particles and enable "Generate Thinking Particles".
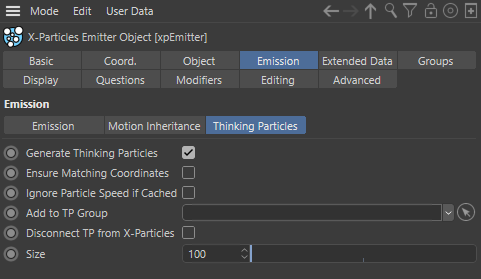
2. Thinking Particles Setup
- A TP Group needs assigning to the xpEmitter(s) and a TP Geometry Object for the export to work.
- Open the "TP Settings" Dialog ("Thinking Particles Settings" pre R21), found in the C4D Top menu under Simulate > Thinking Particles. This gives us access to the TP Group options.
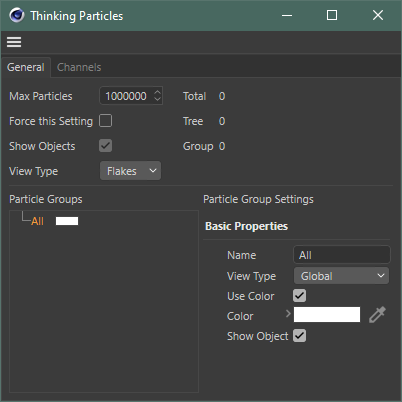
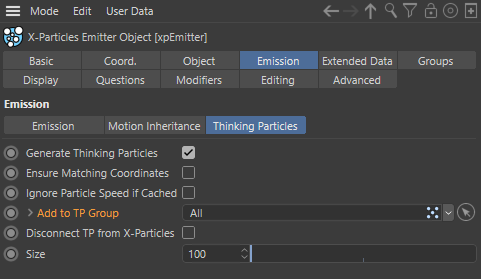
- With the xpEmitter(s) still selected and on the Thinking Particles Quick Tab, drag a Group (e.g., "All") in to the "Add to TP Group" link field.
- Add a "TP Geometry" object ("Particle Geometry" pre R21) from the C4D Top menu under Simulate > Thinking Particles.
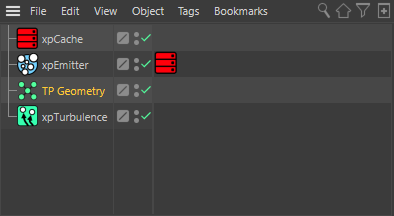
- Drag the same Group that was added to the xpEmitter from the TP Settings window in to the TP Geometry's "Particle Group" link field.

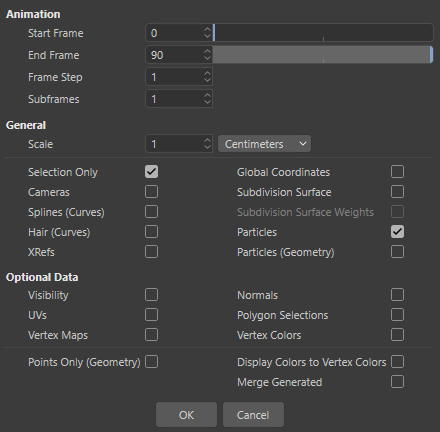
3. Alembic Export
- With the TP Geometry object still selected go to File > Export and select "Alembic (*.abc)".
- Set the general Alembic settings (e.g., Start and End Frame etc) to suit the scene.
- Ensure "Particles" is enabled.
- Hit "OK".
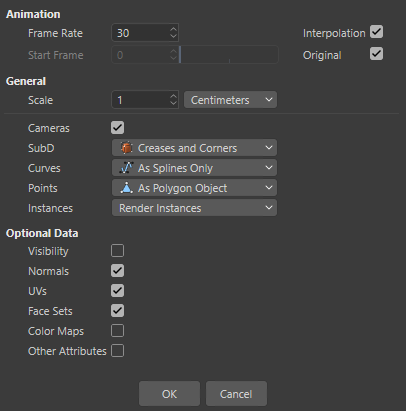
4. Alembic Import
- To add the cached Alembic back in to the same scene, go to File > Merge. Navigate to the Alembic and open it
- In the Alembic Import Settings window, ensure the "Points" parameter is set to "As Polygon Object".
- Hit "OK".
Provided all was correct with the export, an Alembic object matching the name of the TP Geometry object will be added to the scene.
5. Checking the Imported Alembic
- (Optional) Disable all of the existing simulation objects (xpEmitter(s), TP Geometry etc). This makes it easier to see the imported Alembic points but is not essential.
- Play or scrub the timeline and observe the points in the viewport, they should match the cached particle positions.
Is INSYDIUM Fused compatible with Cinema 4D Lite?
No, INSYDIUM Fused is only compatible with the full version of Cinema 4D.
For full compatibility information, please click here.
What happens if an automatic payment for my Subscription license fails?
All recurring Subscription payments are handled via PayPal and if a renewal payment fails, your license is automatically suspended.
PayPal automatically attempts to take payment 3 times at 5-day intervals and if payment is not received after these attempts, your payment profile and license will be canceled.
If you wish to regain access to INSYDIUM Fused after your Subscription has been canceled, you simply need to purchase a new Subscription via the INSYDIUM Shop.
Please note that we are unable to change the payment attempt schedule as this is determined by PayPal.
How do I use the INSYDIUM Fused Library Assets?
The process for installing the majority of the INSYDIUM Fused Library Assets will depend on which Cinema 4D version you are using.
Cinema 4D R25+ Cinema 4D S24 and lower
Cinema 4D R25+
In Cinema 4D R25+, the Library Assets are installed via the Asset Browser (Shift + F8).
Once the Asset Browser is open, click the Create Menu and navigate to the bottom option, Import Legacy Library.
This will then allow you to import the full .lib4d library and you can access the Assets through the Asset Browser.
Cinema 4D S24 and lower
The Library Assets are installed in Cinema 4D S24 and lower via the Content Browser.
To install within the Content Browser, you need to add the .lib4d library to the relevant folder within the Cinema 4D Preferences.
The file path for this folder will look similar to the below:

Once installed, you will be able to access the Assets through the Content Browser.
For more information on how to install the 360 Skies pack, please click here, and for more information on installing the Taiao Plant Packs is here.
Please note that depending on the scaling of your project, you may need to adjust the Library Assets to match.
How do I install the 360 Skies Library Assets?
The 360 Skies files can be added to the Asset Browser manually using the Create > Add File to Database option or you can simply navigate to the folder location of the relevant file when required.
What is Taiao?
Taiao is a procedural plant animation system used to generate trees, flowers, grasses and custom objects.
See our Taiao product page for more information.
How do I install the Taiao Plant Packs?
To install within the Content Browser, you need to unzip the folders into the INSYDIUM > Taiao > scene_presets folder within the Cinema 4D Preferences.
The file path for this folder will look similar to the below:
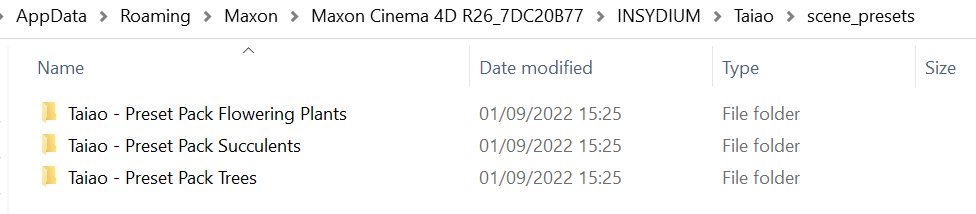
Once installed, you will be able to access the Taiao Plant Packs through the INSYDIUM Menu.
My render node system does not have a GPU, will INSYDIUM Fused work?
If you are using a Windows machine without a GPU to render (such as a blade server) and INSYDIUM Fused is not showing within the Cinema 4D Console once installed, it is likely that your system does not have Vulkan installed.
To resolve this, follow the link below and install the Vulkan runtime (not SDK):
What is NeXus?
NeXus is a GPU particle and simulation system integrated into X-Particles.
See our NeXus product page for more information.
I cannot find the INSYDIUM Tags Menu in Cinema 4D
Due to a change implemented by MAXON in Cinema 4D 2023+, the INSYDIUM Tags Menu is now found within Tags > Extensions:

INSYDIUM Fused is not working on my Apple M2
Apple M2 systems do not have Rosetta installed by default and this is required to run INSYDIUM Fused.
To resolve this and use INSYDIUM Fused on an M2 system, you simply need to install Rosetta by executing the below command in the Terminal:
/usr/sbin/softwareupdate --install-rosetta
If INSYDIUM Fused is still not loading on your Apple M2 system after installing Rosetta, please contact our Customer Services team.
Managing your INSYDIUM Fused license
Changing your machine operating system or hardware
You can switch between machines easily by releasing a license on one machine and allocating it to another.
If you:
- change the operating system version
- reinstall the operating system or restore the OS from backup
- alter the machine hardware such as the CPU, motherboard, graphics cards or disk drives
- change the system information such as the machine name or the name of a user profile
You may find that the INSYDIUM Fused license is showing as already allocated when you run Cinema 4D. If that happens, you will need to log in to your Customer Account on our website and reset your license.
Changing your license
If you need to change the INSYDIUM Fused license on your machine, you can do so by clicking 'Change License...' in the main INSYDIUM menu.
Your name, email address and current INSYDIUM Fused license will automatically be filled in for you.
You can then alter these settings as required and click the OK button to make the change.
Removing a license permanently from a system
You can also use this dialog box to remove an INSYDIUM Fused license from this machine permanently. To do that, delete everything in the three entry fields and click OK. You will be asked to confirm that you want to do this. You can re-enter the license details at any point if you want to use INSYDIUM Fused on this machine again.
Rendering INSYDIUM Fused using Team Render
To use Team Render, ensure that you have a network of two or more computers that can all 'see' one another on the network and that INSYDIUM Fused is installed within Cinema 4D on each system. These machines can be all PCs, all Macs, or a mixture of both.
To use Team Render effectively, you must cache the scene. Please click here for detailed information on using xpCache.
As a general rule, we would advise choosing internal caching for small scenes with few objects and external caching for long scenes and/or scenes with many cached INSYDIUM Fused objects.
If you are using Team Render, click here or if you are using Team Render Server, click here for relevant instructions.
If you are experiencing issues using Team Render after following the instructions, click here for further troubleshooting information
Should I purchase Maintenance or the Complete Upgrade?
Please click the button below that corresponds to your current license status.
My Maintenance has expired and I don't have the latest Build
My Maintenance expired after the release of the latest Build
My Maintenance has expired and I don't have the latest Build
Purchasing Maintenance or the Complete Upgrade will give you access to the latest build of the full INSYDIUM Fused Collection.
The £300 Complete Upgrade product will give you perpetual access, including eligibility for related Service Updates but you will not receive Release Updates. When a Release Update is available, you will need to purchase another Complete Upgrade to gain access. Purchasing this product means that Maintenance will no longer be required and your license cannot be reverted.
The £250 Maintenance option will give you 12 months access and this will include Updates. If you do not renew your Maintenance, after the 12 months expires, you will retain access to X-Particles only.
My license has Maintenance
If your license has Maintenance, the best option for you will depend on if you intend to keep your Maintenance up to date and if you require access to Updates as they are released.
If you intend to keep purchasing Maintenance to keep your license up to date, we would recommend purchasing this option as it would be more cost effective.
If you think that you might let your Maintenance lapse in the future but want to keep access to the full INSYDIUM Fused Collection, we recommend the Complete Upgrade option. Purchasing this product means that Maintenance will no longer be required and your license cannot be reverted.
My Maintenance expired after the release of the latest Build
If your Maintenance expired after the latest INSYDIUM Fused Release Update, this means that you currently have access to the latest INSYDIUM Fused or X-Particles Build.
The £300 Complete Upgrade product will give you perpetual access to the full Fused Collection, including related Service Updates, but you will not receive Release Updates. When a Release Update is available, you will need to purchase another Complete Upgrade to gain access. Purchasing this product means that Maintenance will no longer be required and your license cannot be reverted.
The £250 Maintenance option will give you 12 months access and this will include Updates. If you do not renew your Maintenance, after the 12 months expires, you will retain access to X-Particles only.
Using Team Render
Internal cache
Rendering a scene using Team Render with an internal cache is very simple:
- in the Cache object, set the 'Cache Type' to 'Internal (Memory)'
- cache the scene
- for each of the Cache tags that have been created, turn on the 'Copy Tag Data' switch (this is essential!)
- save the file to save the cached data
- click ‘Team Render to Picture Viewer’ in the Cinema 4D Render Menu
External cache
Rendering a scene using Team Render with an external cache requires further setup.
First, you need to decide where the cache files are going to go. This does not have to be in the same folder as the scene file, however, it MUST be accessible to all the clients on the network. This isn't the same as the machines just being on the same network; the folder must be 'shared' so that it can be accessed by the other machines.
Sharing a folder is done differently on Windows and OSX and you will need to consult the documentation for the relevant OS for more information.
In the Cache object, you must enter the shared folder where the cache files will be saved into the 'Folder' link field. If you click the little arrow next to the 'Folder' name you see some more options, some of which you may need to change later.
The next step depends on whether you have a same OS or mixed OS network.
Same OS Network Mixed OS Network
Same OS Network
If you are using a same OS network, the clients should be able to access the shared folder you created so you can click ‘Team Render to Picture Viewer,’ as for internal caching. If the clients cannot access the shared folder then the folder is not shared correctly or the network isn't set up correctly.
Mixed OS Network
If you are using a mixed OS network, Windows and OSX do not handle file paths in the same way, meaning that an OSX machine cannot use a file path formatted by Windows and vice-versa. This is the reason for the 'Alt Folder' link field you see in the additional options in the Cache object:
Windows primary system
If you are using a Windows primary system with OSX clients, the shared folder on the primary system must be 'mounted' as a volume on the Mac. You will need to know the name of the primary machine on the network and the name of the share you created. On each client:
- in the Finder menu, click Go->Connect to Server...
- when the dialog box appears, type 'smb://PrimaryName/SharedFolder' - so for example, if the primary machine is called 'myPC' and the share name is 'xpcache' you would enter 'smb://myPC/xpcache'
- OSX will then try to access that shared folder; it may ask for your account username and password
- if this is successful, if you open a Finder window, you should see the new shared folder under the 'Volumes' section (if you don't see that section you may need to show it by using the Finder > Go menu > Go To Folder... and enter '/Volumes' without the apostrophes)
This is required on each client system and you have to mount each shared folder that you want to use. Fortunately, OSX allows you to mount external shares automatically on startup, so you only need to do it once.
In the primary machine, you then need to tell the OSX clients where to find the cached files by entering the information for the newly created volume into the 'Alt' file path. For example, if the share name is 'xpcache' then in the 'Alt' field you would enter '\Volumes\xpcache' (without the apostrophes). Note the leading backslash, which is critical for this to work. It also needs to be 'Volumes' not 'Volume'.
You should now be able to click Team Render to Picture Viewer and the clients will find the cache files in the correct place for the render.
OSX primary system
If you are using an OSX primary system with Windows clients, you will need the name of the Mac primary by which other machines can access shared files. You can get this from the file-sharing dialog box.
On the primary machine, you need to tell the Windows clients where the cached files are. For example, if the Mac shared machine name is 'my-iMac' and the shared folder is 'xpcache', then in the 'Alt Folder' field you should enter '\\my-iMac\xpcache' (without the apostrophes). Note the double backslash to start the name.
X-Particles features are missing from my installation
If some features are not showing in the X-Particles menu in Cinema 4D, your system is likely missing important Microsoft Visual Studio redistributable files.
Please note that the missing items are usually xpFluids or xpJoin but depending on your system, it could also affect other features.
To resolve this, click here and install the v14 (2017 - 2026) and 2013 x64 packages:
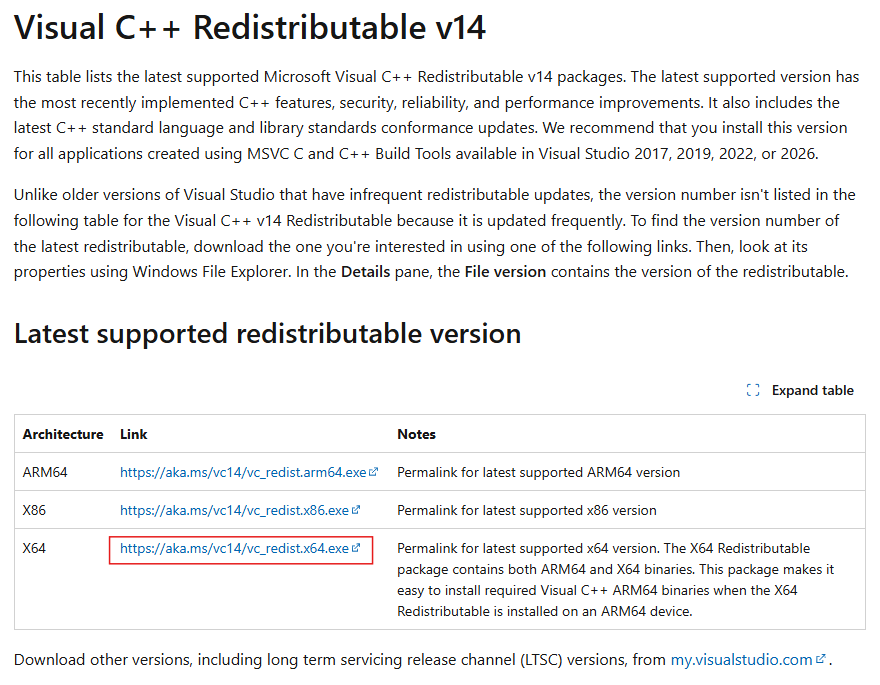
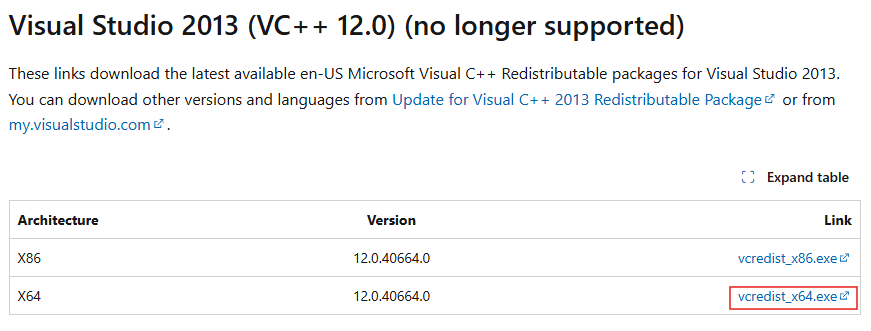
Once installed, on re-opening Cinema 4D, you should see that the missing elements are now shown in the Menu.
Using Team Render Server
Team Render Server has significant advantages in terms of controlling render jobs on large render farms, however, using INSYDIUM Fused with TRS can be problematic.
With TRS, you 'upload' assets to the server which then distributes them to the clients rendering that job. You do this by saving the project with all its assets (Cinema 4D File menu->Save Project with Assets...) which collects all the assets into one single folder. In the X-Particles Cache object, if you turn on 'Cache Files as Assets', the cache files will be saved to the folder 'Save Project with Assets' created.
However, TRS will recognize only certain file types as assets - e.g. Cinema 4D scene files, various image formats, etc. and it does NOT recognize X-Particles cache files. This means that TRS will not distribute the cache files to render clients.
To use TRS with a cached X-Particles scene, you need to set up the scene in the same way that you would if using Team Render. You must choose the cache type and a location for the cached files. You can turn on 'Cache Files as Assets', but then the files will be saved to the project folder and you will need to share that folder so it is visible to the client machines.
If you are using internal caching, once the scene is cached and saved, you simply upload it to the server in the web interface and click 'Start'.
If you are using external caching, you will have to save the cache files to a shared folder on your network. If you enable 'Cache Files as Assets' in the Cache object, the cache files will be stored in a subfolder of the project folder that Cinema created when you save the project with assets in the Cinema 4D File menu, and you need to share that project folder over the network.
Instead of the above, we recommend that you create a shared folder that will be used for any render job and save the cache files into that. Do not enable 'Cache Files as Assets' in that case, and there is no need to upload the cache files to the server. The workflow using TRS then becomes very similar to using Team Render - create the share, save the cache files to it, and point the folder field in the Cache object to the shared folder where the cache files are located. And of course, adjust the 'Alt Folder' field as well if using mixed networks.
What is Jidou?
Jidou is a fully procedural animation toolkit that integrates seamlessly into your Cinema 4D workflow.
See our Jidou product page for more information.
Troubleshooting Team Render issues
If you are experiencing issues such as blank frames, frames not rendering in the correct sequence, or simply not working at all, these are likely caused by the network not being set up correctly or an unstable connection. We would always recommend using an ethernet connection if possible and keeping network traffic to a minimum whilst rendering.
If you are using internal caching, the issue may be caused by the primary system not communicating with one or more of the clients. You can check this in the primary machine by using the Render menu->Team Render Machines... command. This displays a dialog box and each client you want to use should have a checkmark in the box to its left and a green dot in the network icon. To check each client, you can right-click it and choose 'Connection Test...' from the context menu. This will show if the connection is working correctly.
If the connections are all satisfactory and it is still not working, be sure that you saved the cached project to save the cache data and that each cache tag has the 'Copy Tag Data' switch turned on.
If you are using external caching, we would recommend turning on the ‘Cache Log’ in the extended options below the cache folder name in the Cache object. This will cause each client to output progress to the console in the TR Client, so you can see which frames are rendered by which client and any specific problems.
Assuming connections between clients and the primary are satisfactory, the usual reason for failure is that the client cannot access the cached files. This could be due to a network problem, or most commonly because the shared folder is not found.
This should not be an issue with PC-only or Mac-only setups but can be with mixed networks. Check that the shares are set up correctly on the primary machine and that the 'Alt Folder' is correctly specified in the Cache object.
To be absolutely sure that the TR client can see the cache files, open the INSYDIUM Preferences on the client and find the 'Default Folder' setting in the Cache Defaults.
You do not need to change this on the clients, as it is the folder the Cache object will save the cache files to, but what you can do is use it to check that the location of the cache files can be seen by the client. Simply use the button at the far right to navigate to the shared folder. If you can do that successfully, it proves that the client can access the cache files.
If you are still experiencing issues, please contact our Technical Support team for further advice.
Why is my older INSYDIUM Fused version not working in Cinema4D on MacOS?
We are aware that older X-Particles versions (Build 1563 and older) are not working with newer MacOS versions.
Unfortunately, this is a common problem with MacOS and older software versions as new operating versions can break them. For example, you cannot use Cinema 4D R19 or R20 on recent OSX Builds as the UI is corrupt, but these work on Windows.
As this is due to Apple making a change to the OS or possibly a bug in their OS, all we can advise at this time is to revert back to an older MacOS Build if you wish to use your older INSYDIUM Fused version.
If you want to upgrade to the latest INSYDIUM Fused versions, compatible with the newer MacOS, you can purchase Maintenance (if your license is eligible) or the Complete Upgrade via your Customer Account.
INSYDIUM Fused Educational Licenses
We offer two educational licenses for INSYDIUM Fused, and eligibility will depend on your academic status.
When purchasing an educational license, you will be prompted to upload proof of your academic status. This proof must match the name under which the license is to be registered. If purchasing as a teacher, the license must be registered to your academic email address. Please allow up to 3 working days from the date of purchase for us to review the proof and confirm your order.
For information on each license, including accepted proofs, please click the buttons below.
INSYDIUM Fused Learning Edition INSYDIUM Fused Academic License
INSYDIUM Fused Learning Edition
We offer a discounted INSYDIUM Fused license for full-time students at non-profit educational institutions. The INSYDIUM Fused Learning Edition can be purchased from our shop. It includes X-Particles, NeXus, Taiao, TerraformFX, MeshTools and Jidou, and can only be used with the Maxon One Student license.
INSYDIUM Fused Learning Edition licenses are valid for a period of 6 months, and to renew, you will need to re-provide proof of academic status. Renewals are limited to a maximum of 5 per license within a 3-year period.
Please note: The INSYDIUM Fused Learning Edition saves in its own file format, and scene files created using this license type cannot be opened in the full version of INSYDIUM Fused.
The INSYDIUM Fused Learning Edition should not be used for commercial work.
If you do not have the Maxon One Student license or are a teacher at an educational institution, you may be eligible for an Academic license with a 50% discount.
Accepted proofs:
- Student ID
- Letter from educational institution on letterhead with dates of study
- Link to work on school/university site (must use student email address)
*The Learning Edition license is only available for students. If you are a teacher or faculty, you will need to purchase the Academic license.
Please upload your evidence to us in a form that we can easily translate in Google, e.g., Latin alphabet.
INSYDIUM Fused Academic License
We offer a 50% discount on INSYDIUM Fused perpetual licenses by adding the Coupon Code ACADEMIC in the shopping cart.
This is for an Academic INSYDIUM Fused license that will work with the full Cinema 4D version.
The INSYDIUM Fused Academic License should not be used for commercial work.
Accepted proofs:
- Student ID with expiry date
- Letter from educational institution on letterhead with dates of study
- Teaching/faculty ID card* (must use faculty email address)
- Link to work on school/university site (must use student or faculty email address)
*Only teachers and faculty at non-profit organizations are entitled to the above discounts, and proof of non-profit status may be requested.
Please upload your evidence to us in a form that we can easily translate in Google, e.g., Latin alphabet.
Panning the viewport with xpExplosiaFX or xpFlowfield in the scene causes a crash
We are aware of this issue affecting MacOS machines and it appears to occur in Cinema 4D 2025.2 and newer only.
We have investigated this issue internally and raised the issue with Maxon as the problem lies within Cinema 4D. Our ability to resolve it is limited as the crash comes from Maxon's code.
If you are using xpFlowfield, you can turn off the transparency (set it to 0% in the Display option) to work around the crash or revert back to an older Cinema 4D 2025 build.
NeXus FAQ
Please see below for the most common questions we are asked about NeXus:
Why does NeXus only work with a single GPU?
Why is my NeXus project freezing my system or not emitting particles?
Why is my NeXus project not working at all?
Can NeXus projects be rendered over a network?
Will my GPU work with NeXus?
As long as your GPU has at least 4GB of VRAM and supports Vulkan, we would expect NeXus to work with most modern versions of Nvidia, AMD, Apple M Series graphics cards.
Why does NeXus only work with a single GPU?
If rendering, this will send all the scene information to each individual GPU and this can then render a small tile of the final image independently of all other tiles.
Unlike rendering, which is easily distributed across multiple GPUs, running a simulation has to send all of the data to a single GPU as the calculations are dependent on all of the particles.
Why is my NeXus project freezing my system or not emitting particles?
If Cinema 4D freezes, your simulation stops working or your particles are sticking to the emitter on emission when using NeXus, it is likely that your GPU has timed out and rebooted due to a delayed response.
When this happens, the GPU terminates itself and you will need to restart Cinema 4D for your scene to work as expected.
To stop this happening again, you can:
• Ensure that your GPU can handle the scene contents, which may require using less particles or cleaner geometry.
• Ensure that any other Cinema 4D projects have been closed and if you do need to keep them open, that the viewport is set to the starting frame to stop interference from other active simulations.
• Close any other applications that may be utilizing your GPU.
On Windows systems, GPU timeout is managed via the GPU Timeout Detection & Recovery (TDR) and this can be increased if needed, but this is not possible on MacOS
How to add/change the TDR Delay on Windows systems
Run regedit, the Windows Registry Editor
Navigate to: HKEY_LOCAL_MACHINE\System\CurrentControlSet\Control\GraphicsDrivers
If the TdrDelay key exists, double-click on it and change it’s value to 5 or 8.
If the TdrDelay key does not exist, add the key by:
Edit -> New -> DWORD (32bit Value)
Name the key TdrDelay
Double-click the key, make it a Decimal (instead of Hexadecimal) value and set it to 60.
Reboot your system.
Please note that updating Windows can reset the TDR Delay value, so you may need to repeat this process after each update.
Why is my NeXus project not working at all?
Your scene is likely not working at all as your available VRAM has run out.
You can try increasing the available VRAM via the INSYDIUM Preferences, below. If this does not work, you will need to make your scene less intensive.
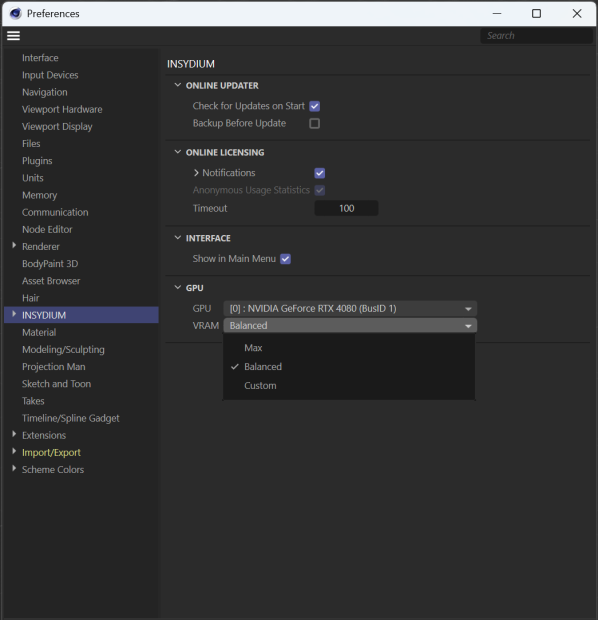
If the scene does not work with increased VRAM, please check your GPU drivers are up to date and if using Nvidia, try both the Studio and Gaming packages.
If still not working, it is likely that your system does not have enough VRAM to play the scene and you will need to streamline it to make it less intensive.
Can NeXus projects be rendered over a network?
Due to the way that data is handled via the GPU, network rendering, including Team Render cannot be used when rendering projects that include NeXus Objects.
Can you cache NeXus Objects?
Yes, the xpCache will work with NeXus Objects.
Which of the nxFluids Solvers should I choose for my project?
The Fluids solver we recommend will depend purely on your simulation, but we can provide some basic advice.
PBD and SPH
These two solvers are purely particle based with PBD being great great for small to mid scale scenes, whereas SPH is recommended for larger scenes where realism is required.
PBD also works well with Constraints and Modifiers while SPH can solve granular simulations.
FLIP and APIC
These solvers use a grid alongside particles and offer stability in larger simulations. For quieter, smoother results, we would recommend FLIP, whereas APIC is useful for livelier simulations such as splashes.
Taiao FAQ
Please see below for the most common questions we are asked about Taiao:
How do I add materials to Taiao Objects?
How do I create real-world flora using Taiao?
Why do I get an error when I add a Taiao Preset to my scene?
I have converted my materials for render, but Taiao Objects are not rendering
How do I add materials to Taiao Objects?
Materials can be added to Taiao Objects via the Cinema 4D Material Manager or alternatively, materials can be added to individual toPlant and toGrass layers by navigating to the Object tab > Add a layer > Materials:
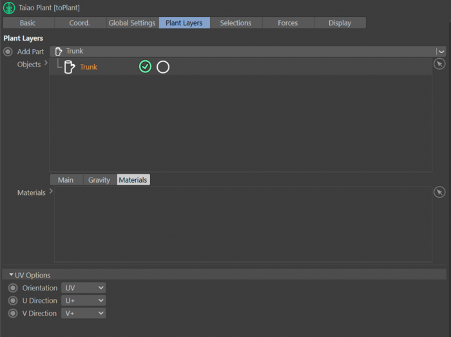
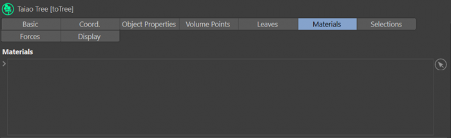
toTree has its own Materials tab available once this object has been added to the scene:
How do I create real world flora using Taiao?
Taiao comes with a Preset Library of real-world trees and flowers.
To access the Preset Browser, navigate to the INSYDIUM Menu > Taiao > Preset Browser.
Taiao also includes toPlant, which provides starting points for Trees, Houseplants, Grass Tufts and Flowers. These can then be modeled to suit the individual plant that you are replicating.
Why do I get an error when I add a Taiao Preset to my scene?
To add a preset from the Taiao Preset Browser, you will need to first save your scene as this will allow the bitmap textures to link correctly.
If you do not save your scene prior to adding the preset, you will see the error below:
For more information on how to use the Taiao Preset Browser, please check the Manuals section of the website.
I have converted my materials for render, but Taiao Objects are not rendering
To improve performance, the Organ Mode option within Taiao Objects is set to Multi Instance by default, however, Multi Instances are not supported by some render engines, including Cycles 4D and Octane.
To render these Objects using these engines, you will need to change the Organ Mode to one of the other options:

NeXus for Blender FAQ
What is INSYDIUM NeXus for Blender?
INSYDIUM NeXus for Blender is a GPU accelerated simulation system for Blender. It gives you fast, interactive particles, fluids and fire with real time feedback in the viewport.
It is a brand new product built natively for Blender, not a port. NeXus for Blender is out now.
Create or log in to your INSYDIUM Customer Account to buy it and find your licence and downloads in My Account.
What are the system requirements for NeXus for Blender?
INSYDIUM NeXus for Blender needs Blender 4.3 or above. It works with Blender 4.3, the 4.5 LTS release and Blender 5.
Builds are available for Windows, macOS and Linux.
NeXus is GPU accelerated, so you need a modern GPU with up to date drivers and at least 4GB of VRAM. On Windows and Linux this needs Vulkan 1.3. On macOS it needs Metal 3.
Operating systems: Windows 8.1 or later, macOS 13.0 (Ventura) or later and Linux with glibc 2.31 or later, for example Ubuntu 20.04 LTS.
Can I try NeXus for Blender?
The free NeXus for Blender Beta has now ended.
A free trial will be available soon. In the meantime you can buy NeXus for Blender from the product page, and find your licence and downloads in My Account.
How do I install NeXus for Blender?
NeXus for Blender is delivered as a Blender Extension from our repository. In Blender 4.3 or above:
- Open Edit > Preferences > Get Extensions.
- Open the Repositories dropdown at the top right and click + to Add Extension Repository.
- Set the URL to
https://extensions.insydium.ltd. - Tick Requires Access Token.
- Paste your access token into Secret, then click Create. Your token is shown in My Account.
- Back in Get Extensions, search for INSYDIUM and click Install on INSYDIUM NeXus.
- In Edit > Preferences > Add-ons, expand INSYDIUM NeXus and enter your INSYDIUM licence to activate.
Where do I find my NeXus for Blender access token?
Your repository access token is shown in the NeXus for Blender panel in My Account. It looks like insx_1_....
When you add the repository in Blender, tick Requires Access Token and paste the token into the Secret field.
How do I activate my NeXus for Blender licence?
Open Edit > Preferences > Add-ons in Blender, find and expand INSYDIUM NeXus, then enter your INSYDIUM licence number to activate it.
This is the licence tied to your INSYDIUM Customer Account.
How do I update NeXus for Blender to the latest version?
New versions are released regularly as we add features and fix issues.
To update, open Edit > Preferences > Get Extensions in Blender and update INSYDIUM NeXus from there.
Does NeXus for Blender send usage statistics?
NeXus sends anonymous usage statistics. You can turn this off in the NeXus preferences.
The statistics gathered are entirely anonymous and no personal information is stored.
Where do I get help with NeXus for Blender?
You can get help with NeXus for Blender through our support forms, or join our Discord community where the team and other artists can help.
Can I use NeXus for Blender for production work?
Yes. NeXus for Blender is a full release and is ready for production work.
We release updates regularly, so keep it up to date from Edit > Preferences > Get Extensions in Blender.
Is NeXus for Blender the same as NeXus in Cinema 4D?
They share the NeXus name, but NeXus for Blender is a new product built natively for Blender. It is the evolution of the Cinema 4D version, with more features and faster performance.
Existing NeXus FAQs that mention Cinema 4D refer to NeXus inside INSYDIUM Fused. For anything about NeXus in Blender, use the NeXus for Blender entries.
NeXus for Blender will not install or does not appear in Get Extensions
If you cannot install NeXus for Blender, or it does not appear in Get Extensions, check the following:
- You are running Blender 4.3 or above. Earlier versions are not supported.
- The repository URL is exactly
https://extensions.insydium.ltd. - Requires Access Token is ticked and your token is pasted into the Secret field.
- After adding the repository, search for INSYDIUM in Get Extensions, then install INSYDIUM NeXus.
Still stuck? Ask on our Discord.
Does NeXus for Blender need an internet connection?
NeXus for Blender uses online licensing. It connects to our licence server to authenticate your licence, so you need an active internet connection to activate and run it.
X-Particles FAQ
Cycles 4D FAQ
Are Nodes considered entire workstations per GPU or per CPU?
A node/seat is considered to be per Cinema 4D/Team Render/CLR Client.