In this case study we talk to Aleksei Segodin in depth about his use of X-Particles and how he achieved the end result in this bright and colourful advert for Nabila K’s Lip Polish Collection.
Hi Aleksei, before we start to talk about your recent work for Nabila K, can you tell us about your background?
Hi, so I'm from Lutsk city, Ukraine. I studied International Economics at University but didn't work a single day in that speciality. My career as a designer started 14 years ago. After graduation, I started working as a designer, and co-founded a small advertising agency in my native city. After a couple of years, I left the company and became a freelancer. After a few more, I moved to France and worked there as a graphic and motion designer.
For 7 years, I was creating illustrations and retouching in Photoshop, designing websites and studied web technologies and programming languages. I developed Flash websites, designed logos and brand identities and worked with 2D & 3D graphics and animation. I even edited videos, tried video production as a director and an on-set supervisor. I made digital matte paintings for feature films, did basic SFX in Adobe Audition and even had a few industrial design projects. I was doing all of this simultaneously; there was no period of “web design" and then a period of “motion graphics". I never saw myself working in a specific role for months or years on end. I like too many things to concentrate on just one. My ideology has still not changed.
In 2012, I was invited for a position as Digital Art Director at Unisono, an advertising agency in Bahrain. While there, I worked on a freelance project together with the Lime Art Group to create a large animation sequence for the Eurovision song contest 2014. My role was to create a huge galaxy to be projected onto 15-meter walls on the stage, it was the first time I used X-Particles. Before then, I’d heard of X-Particles — being in the motion design industry and being familiar with Cinema 4D, not knowing about it was impossible! I was pleasantly surprised by the simple and intuitive interface of the plugin. So, there was no question how I was going to make the galaxy in motion. I bought my first version of X-Particles and made the entire animation with it. I rendered the project in Cinema 4D’s renderer.
The piece you created for Nabila K caught our attention because of how bright, vibrant and playful it is. What was your favourite part of working on this project?
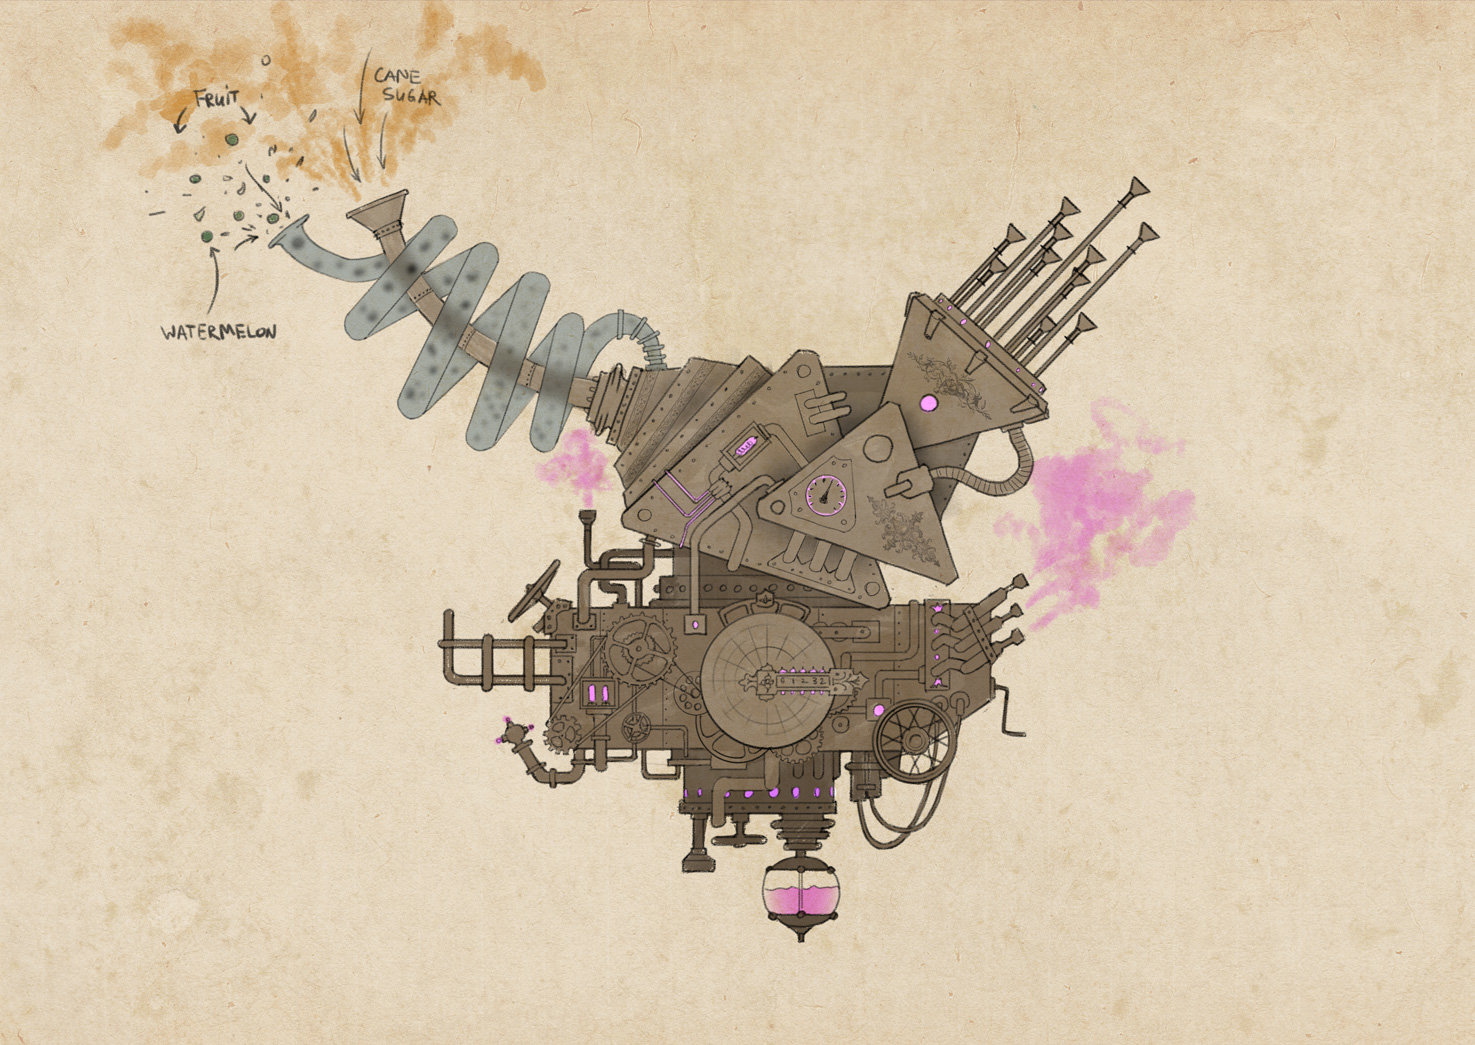
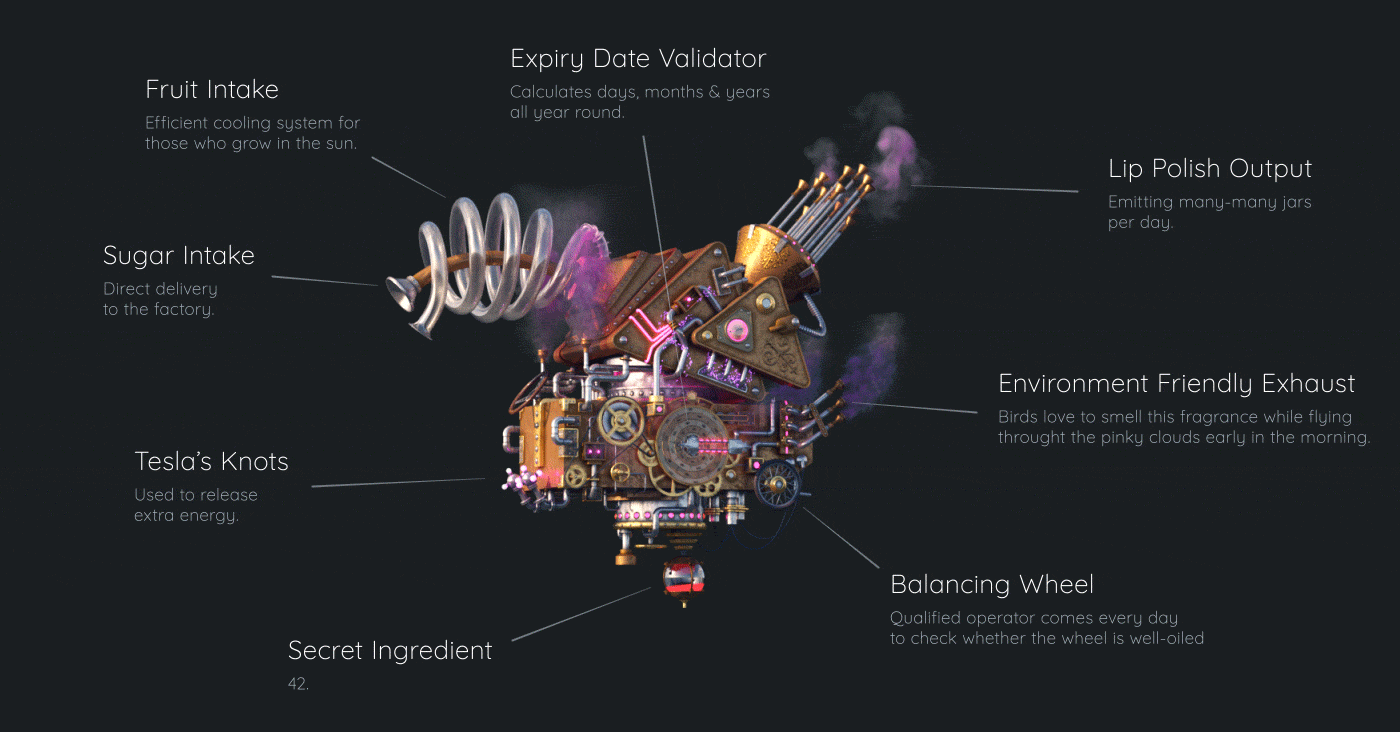
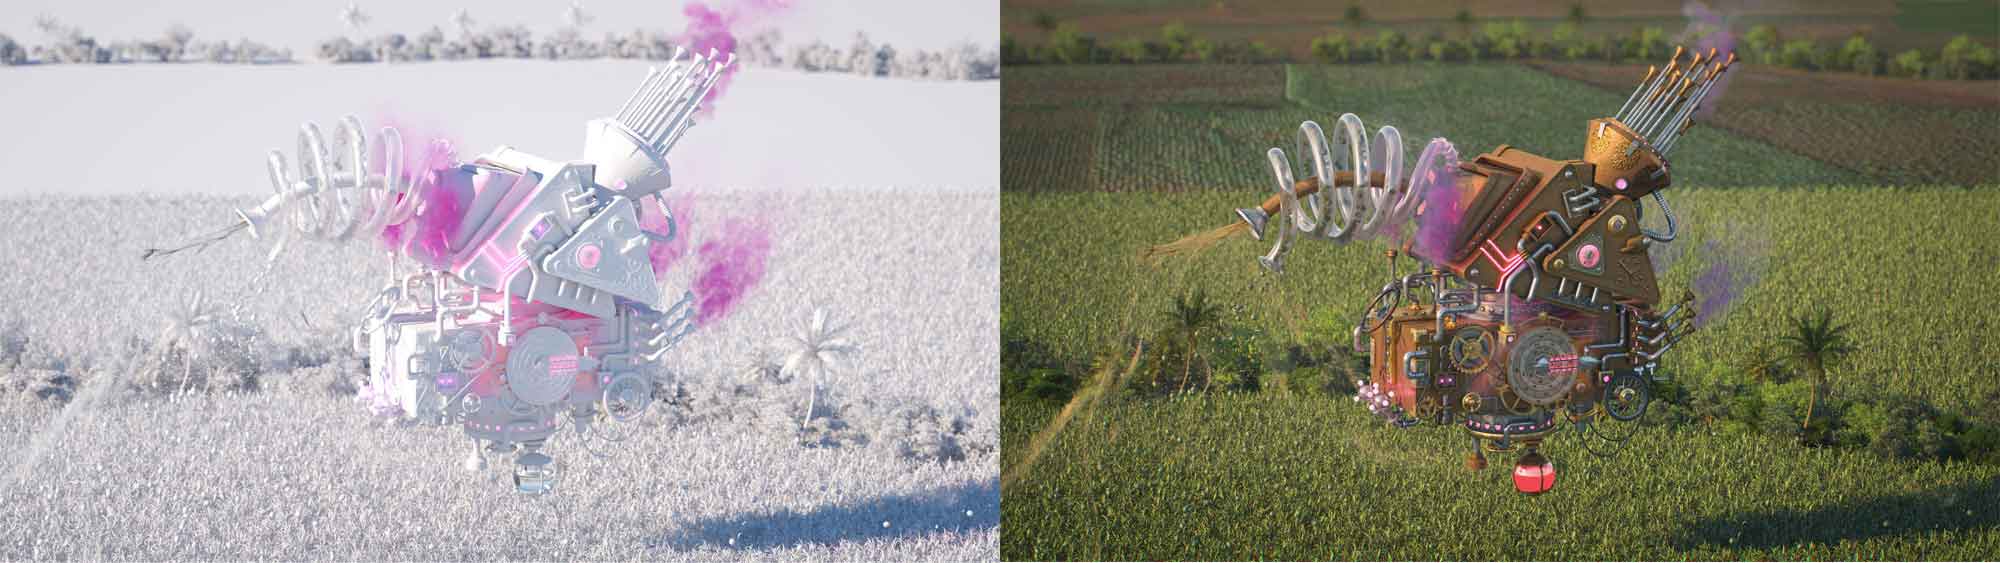
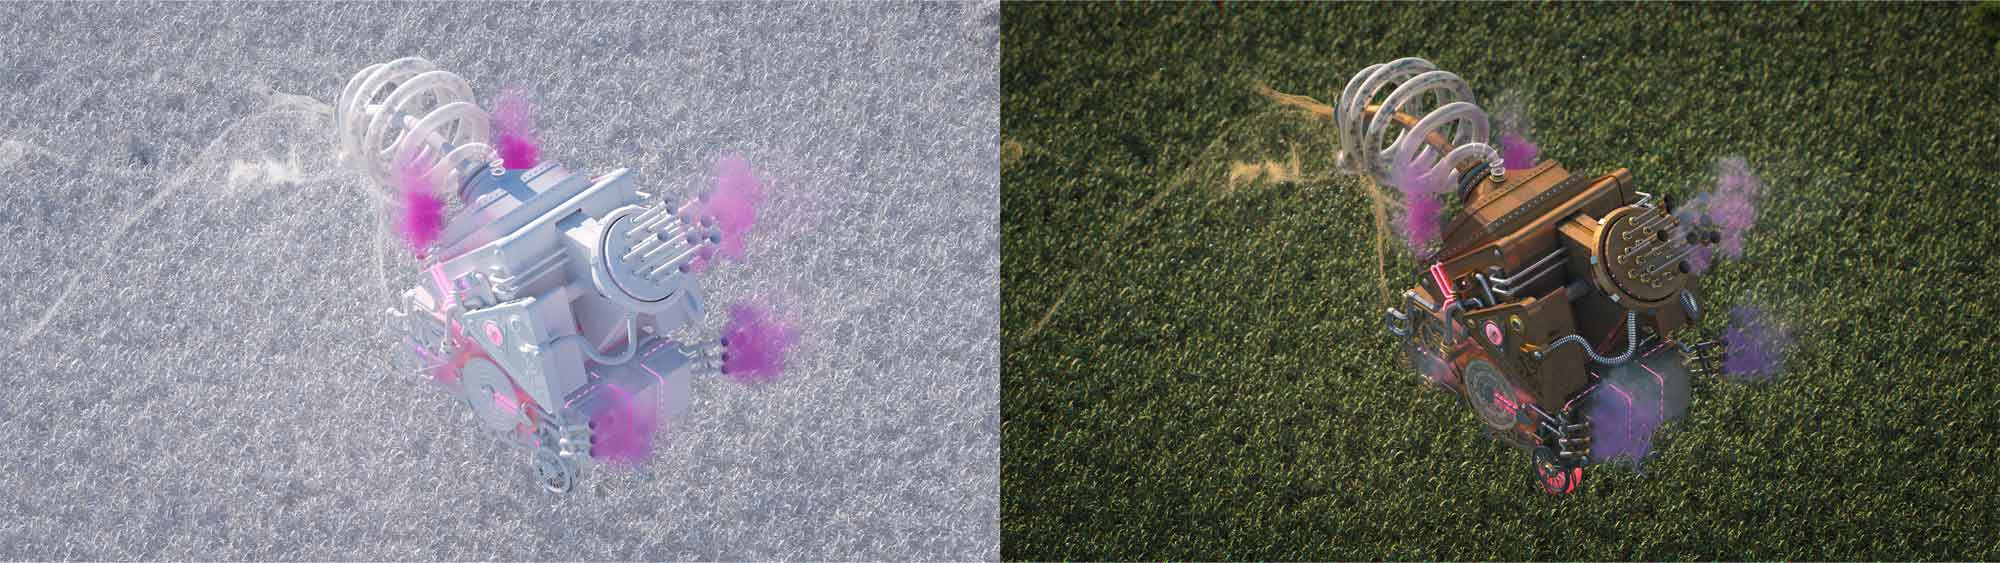
To be honest, I have no favourite part. The project itself is one of my favourites so far because I have many areas of speciality, and this project combined a number of these areas. I liked working with plants and building a vast sugar cane field. I liked the hard surface modelling of the machine and rigging it with XPresso. I love making matte paintings, which took place in this project as well. Even a simple thing like a final packshot compositing and colour correction is something I enjoy. And of course, the dynamics and the particle simulations!

Can you tell us which features of X-Particles you used and why you chose to use them?
For this project, I used X-Particles more extensively than ever. I used particles in all but one shot, where we see shooting canons from aside. In the first shot, I used X-Particles for the sugar simulation, where fruit and sugar are flying through the sugar cane field. Here I placed a default emitter with xpTurbulence and xpAttractor. Turbulence made the flow look natural and the Attractor didn't allow sugar to spread around too much and kept its direction.
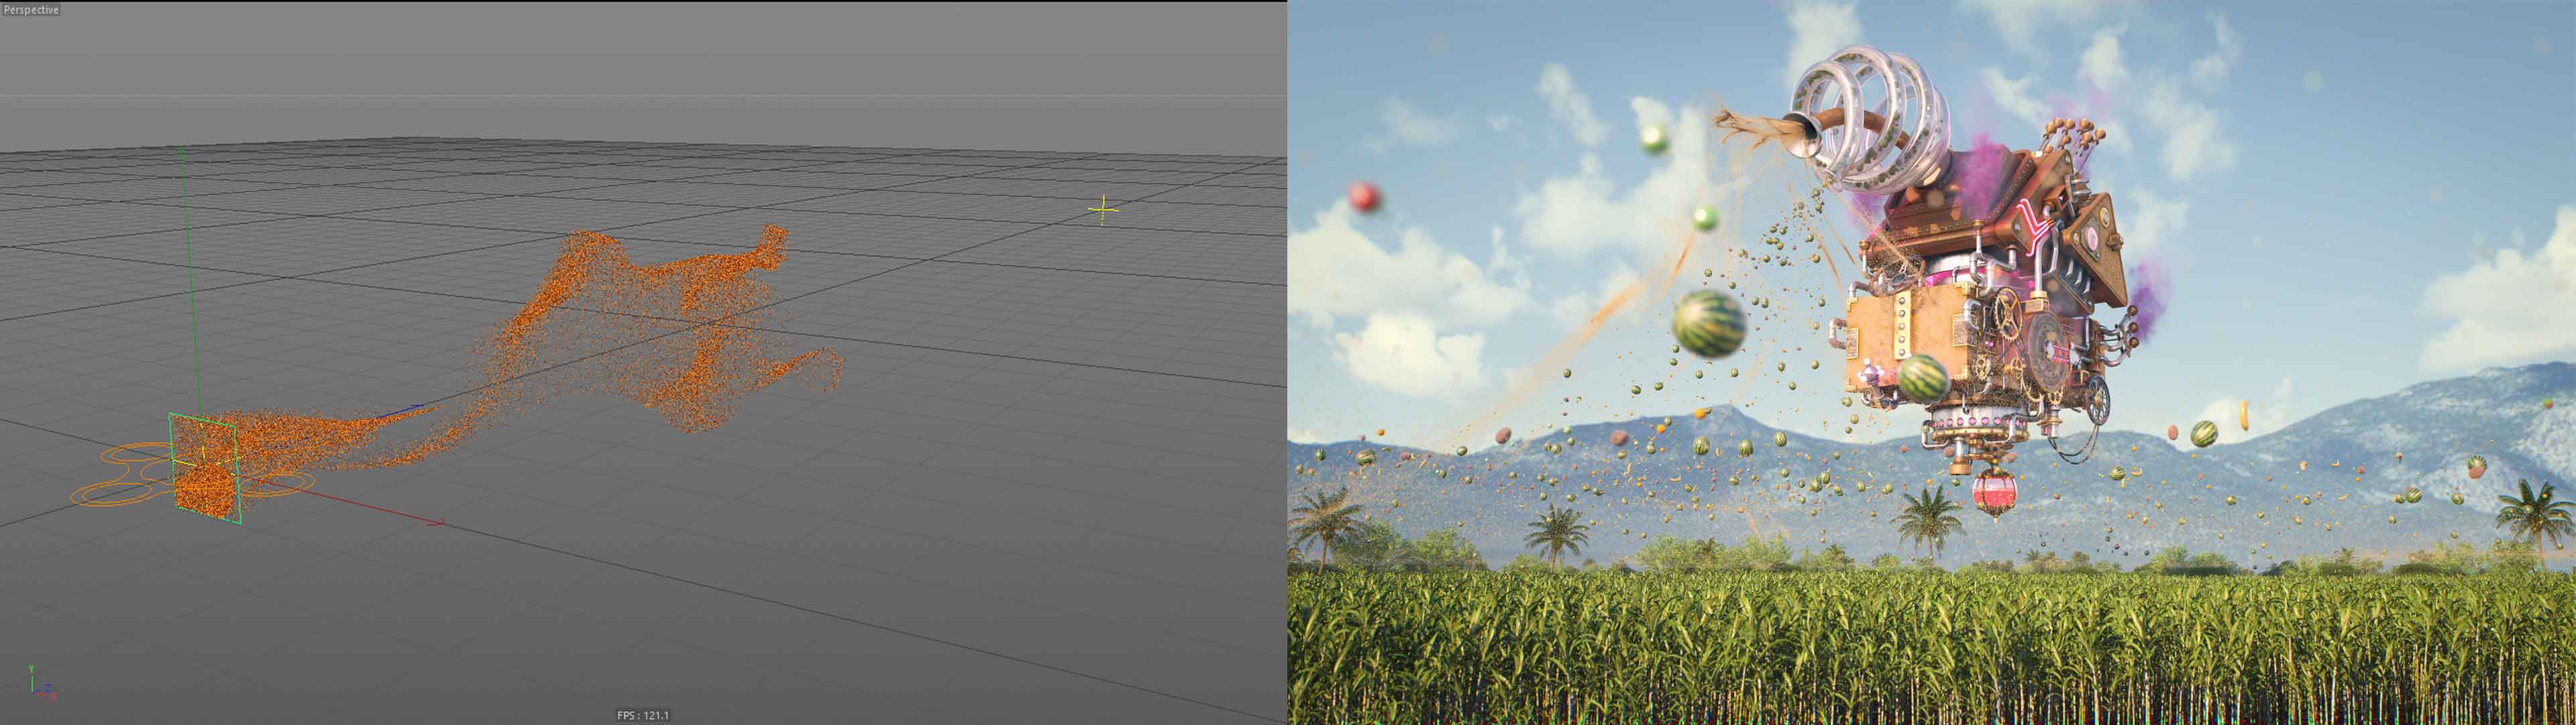
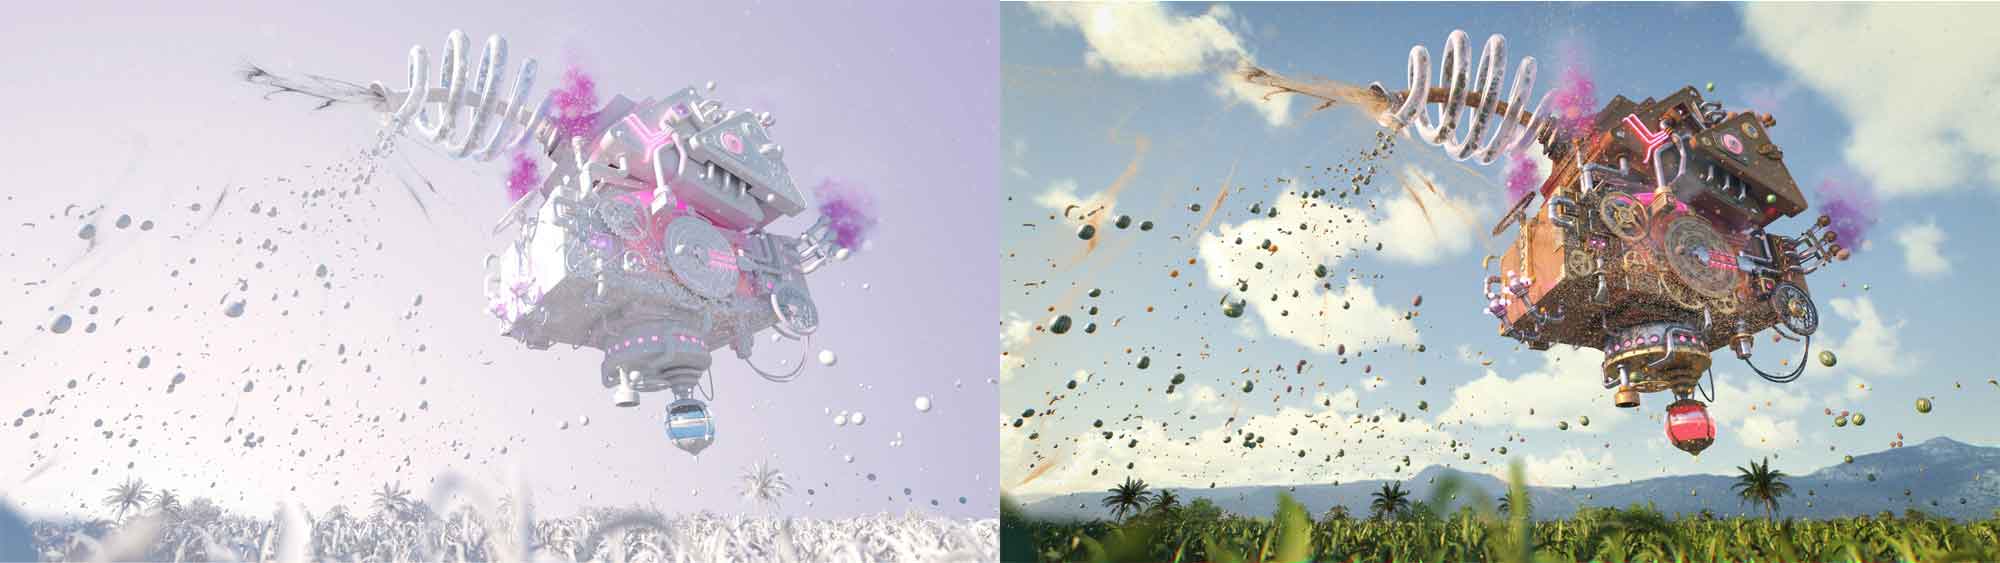
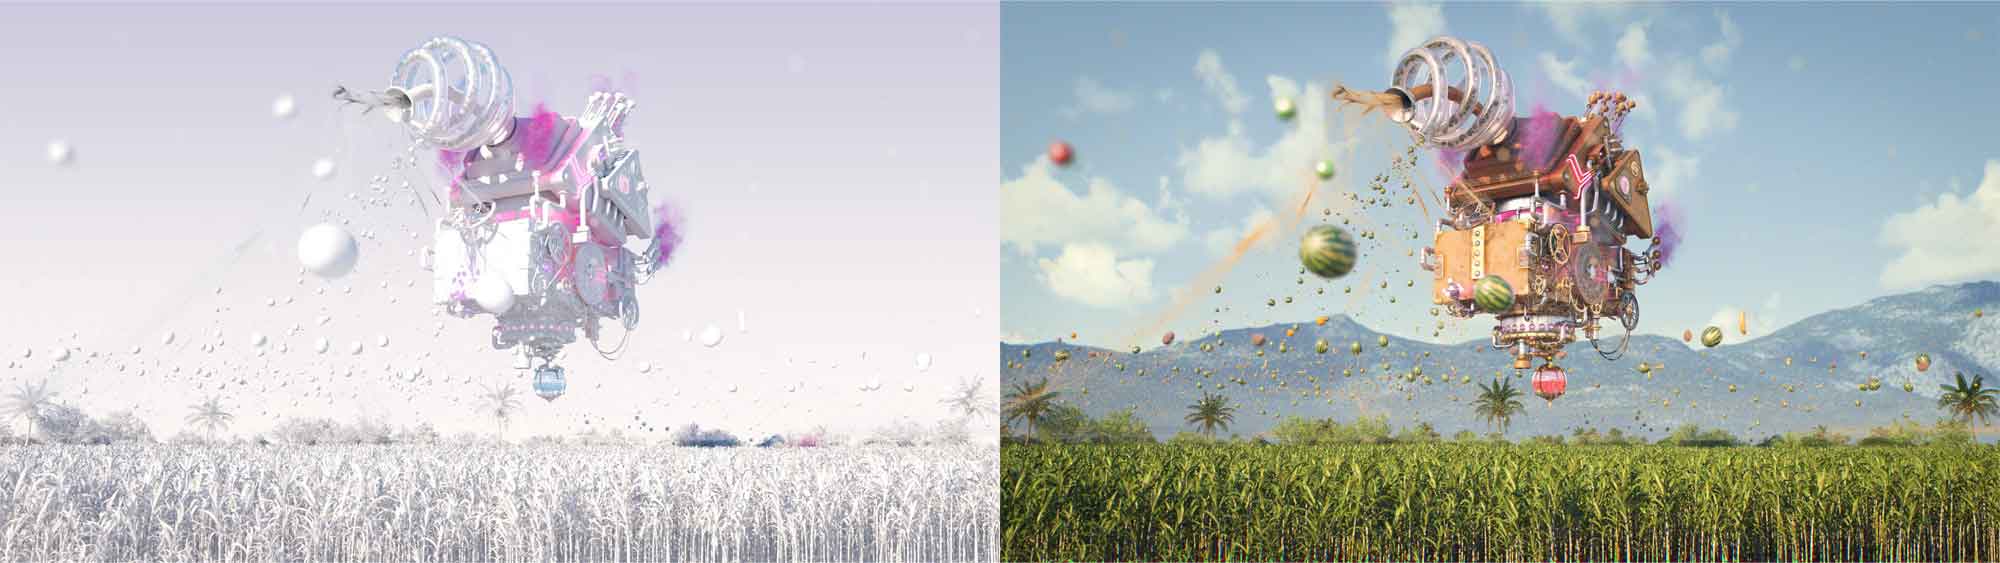
Next was the most complex shot, in terms of particle simulation: when the camera rises above the field and we see how the machine sucks in fruit and sugar from the field. There were two significant challenges in this scene: the scale and the time. With the scale, it's pretty clear: you have to show a cloud of sugar grains floating over a 100-meter long field — that's pretty intense. But with the time, this isn't so obvious. Besides the 2000-frame long sequence, I had to simulate 500 frames more, before the video even starts because when the camera shows the machine, it is already sucking in all those particles.
To create the vortex of fruit, I used xpFollowPath modifier. I placed a ring-shaped emitter around the machine and built a corridor of circle paths in the shape of a vortex which should lead particles into the tube and later along the pipe inside it. I found out that using circle path inside the pipe was better for me than moving particles along a spline. With xpFollowPath modifier, I could better control particles and keep them inside the tube without intersecting the glass. So, finally, it appeared that I had 152 circle paths for the particles to fly through, and the majority of these circles were moving because machine's tubes vibrated continuously. That was fruit.
For the sugar, I didn't use xpFollowPath, but a simple attractor. And additionally, I used turbulence and wind modifiers to emphasize the ‘tornado’ nature of the vortex.
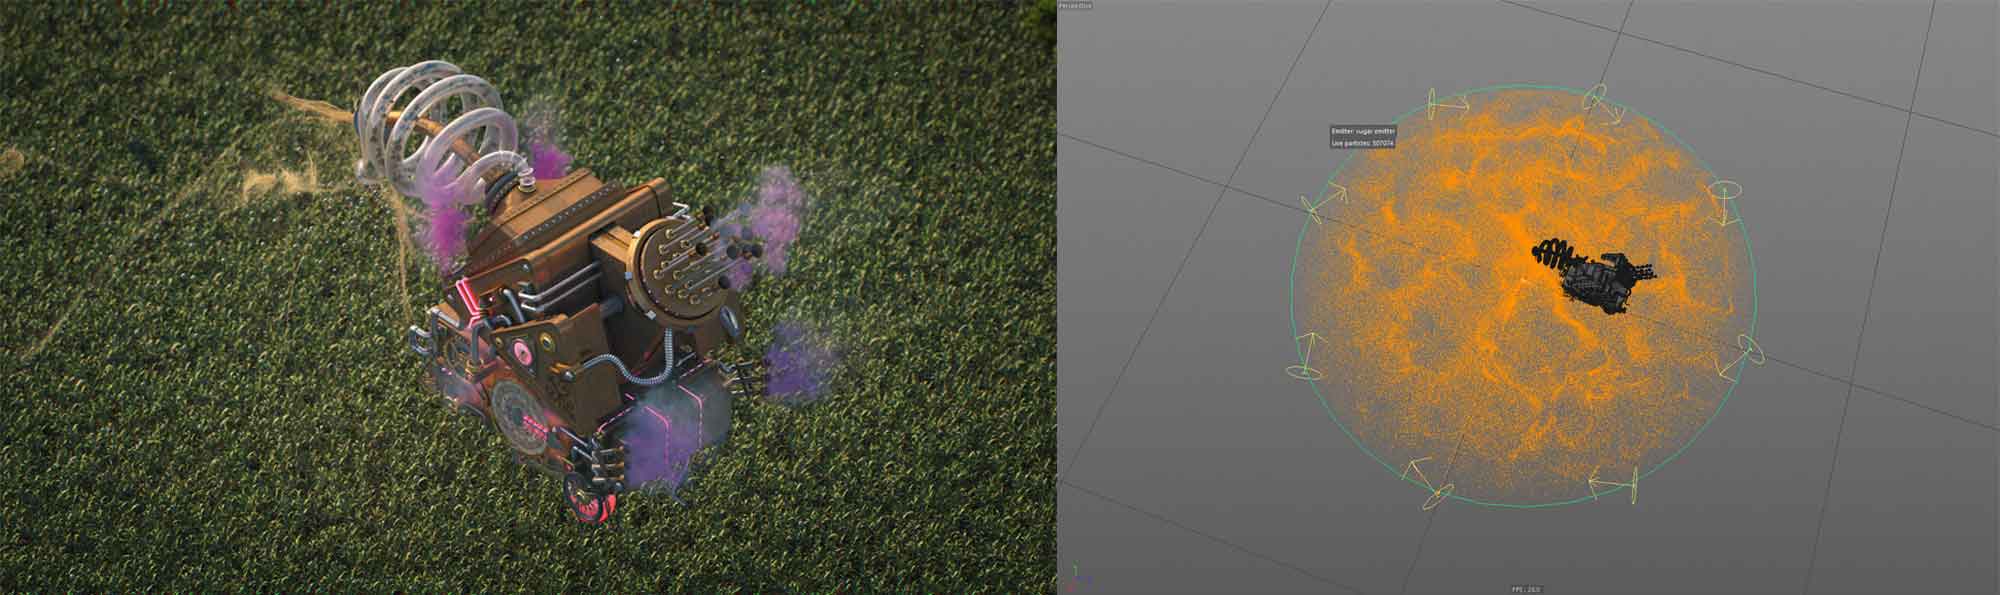
Next, there were magic purple sparkles around the machinery. On such comparatively small scale, it was very convenient to use xpFlowField. I defined the flow direction inside the xpFlowField container with a spline. With xpFlowField, it was easier to build the particle trail because its path was quite sophisticated – it went around the tubes bending in different directions. And I applied the same technique for the other similar particles on the machinery.

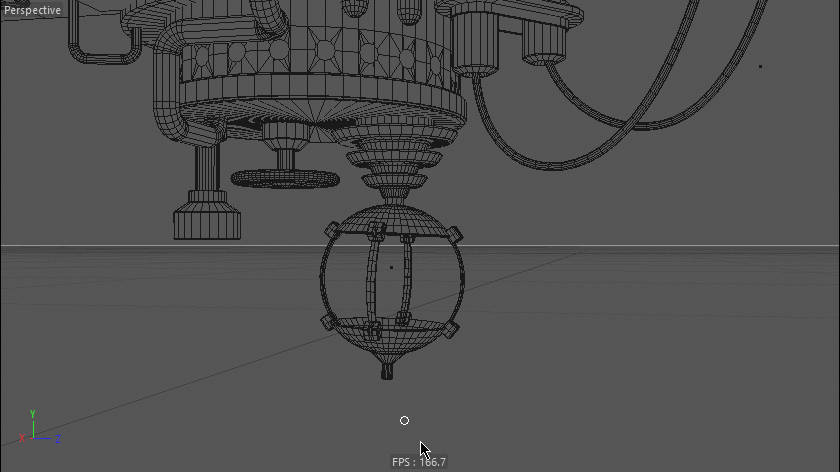
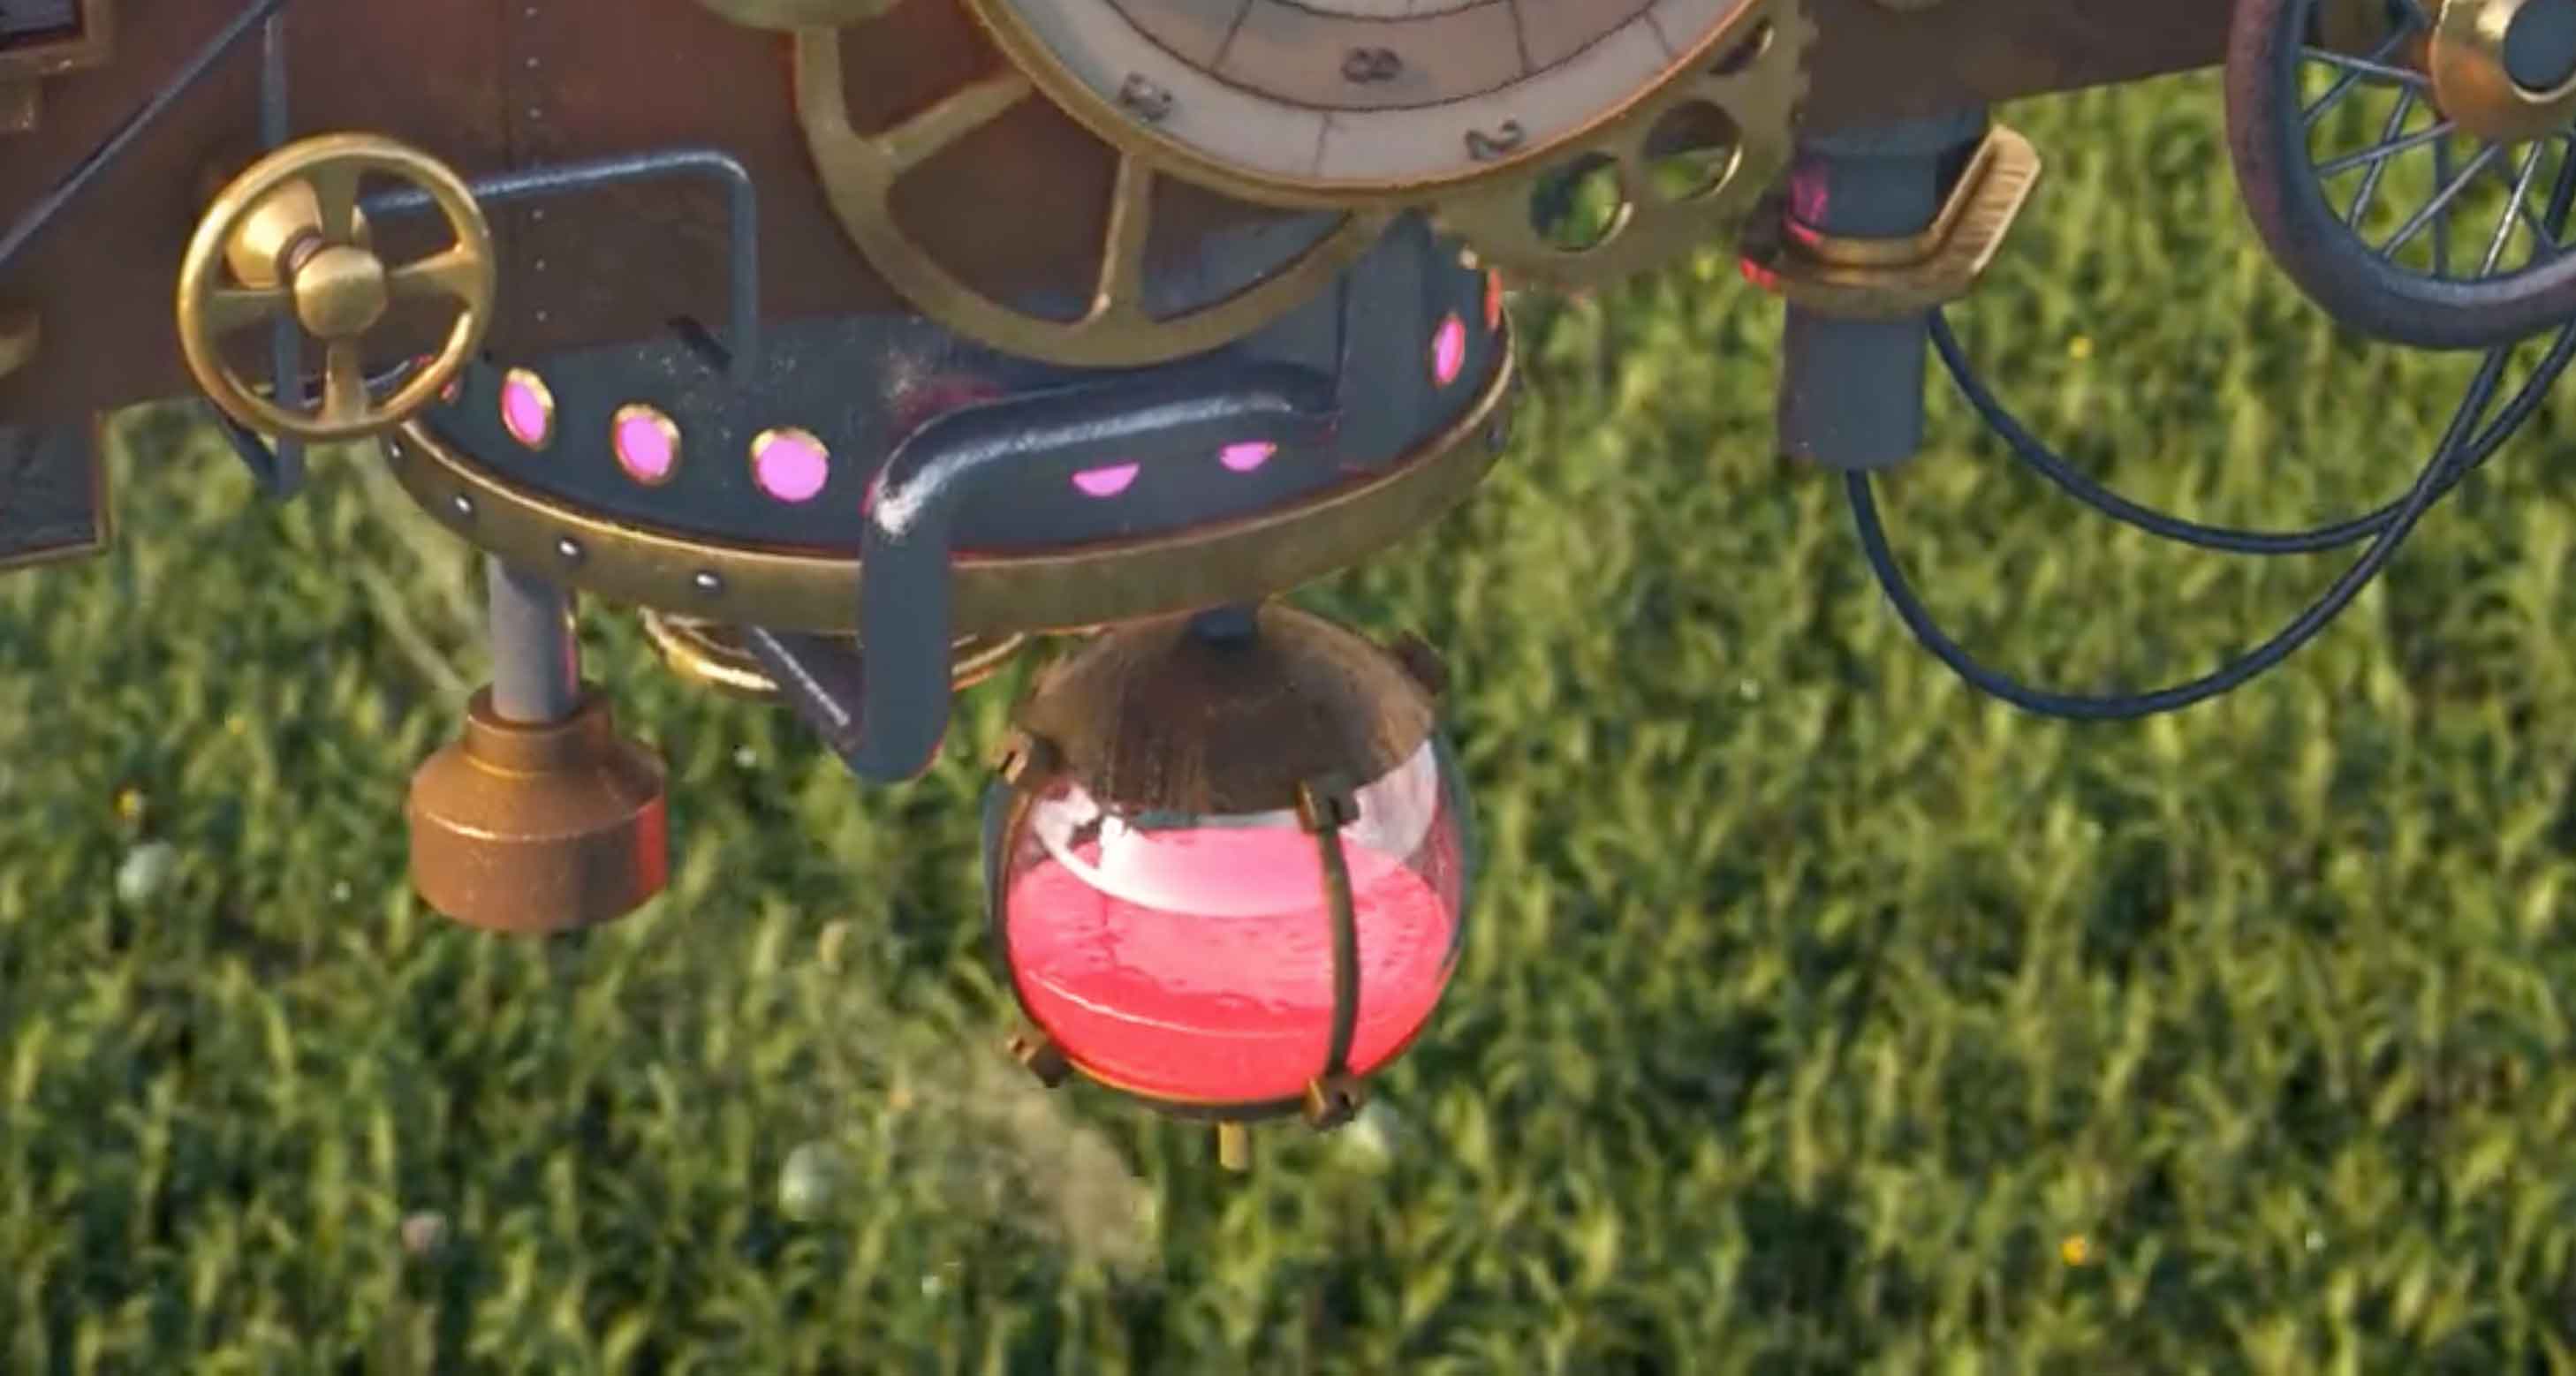
When the camera moves to the bottom of the machine, we see liquid in a glass ball — X-Particles liquid dynamics. I used xpFluidPBD with xpGravity modifier and a sphere with a collider tag. And, for the fluid mesh, I used xpOVDB Mesher.
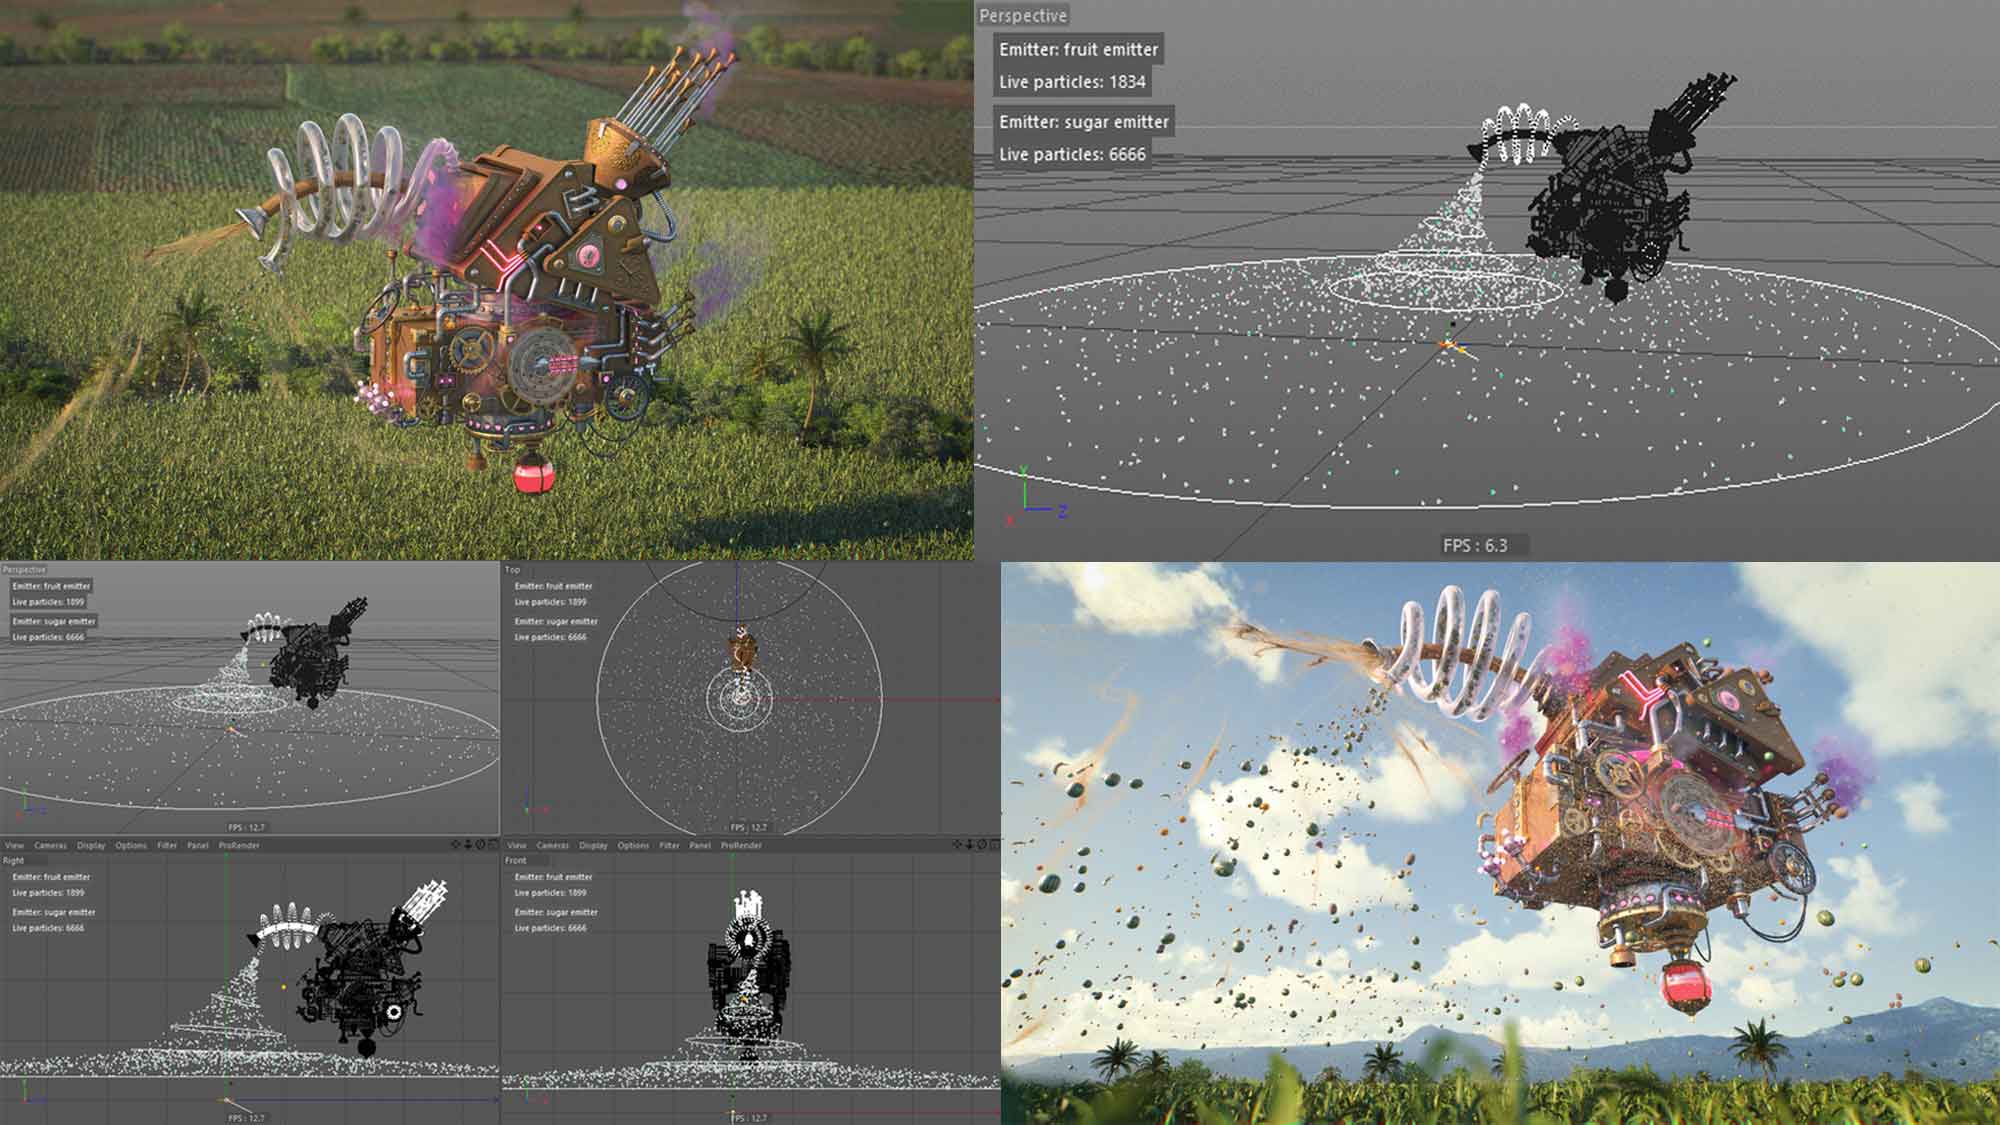
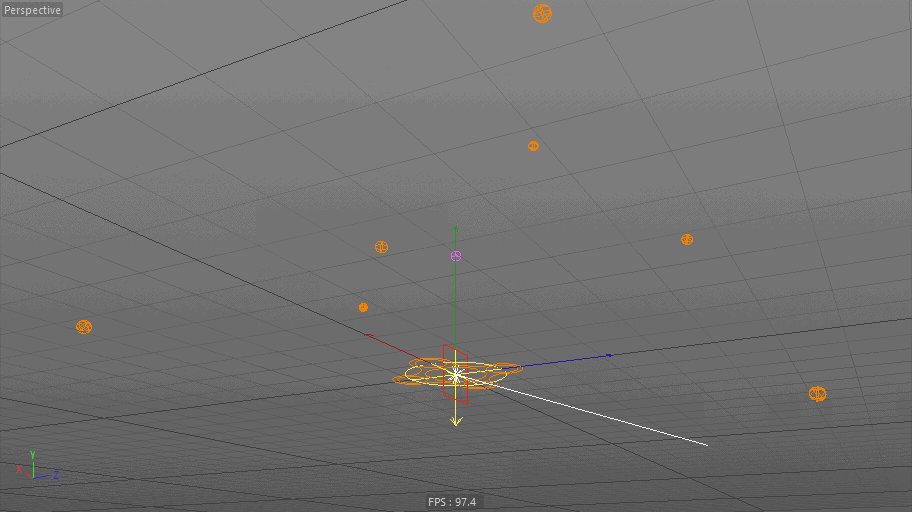
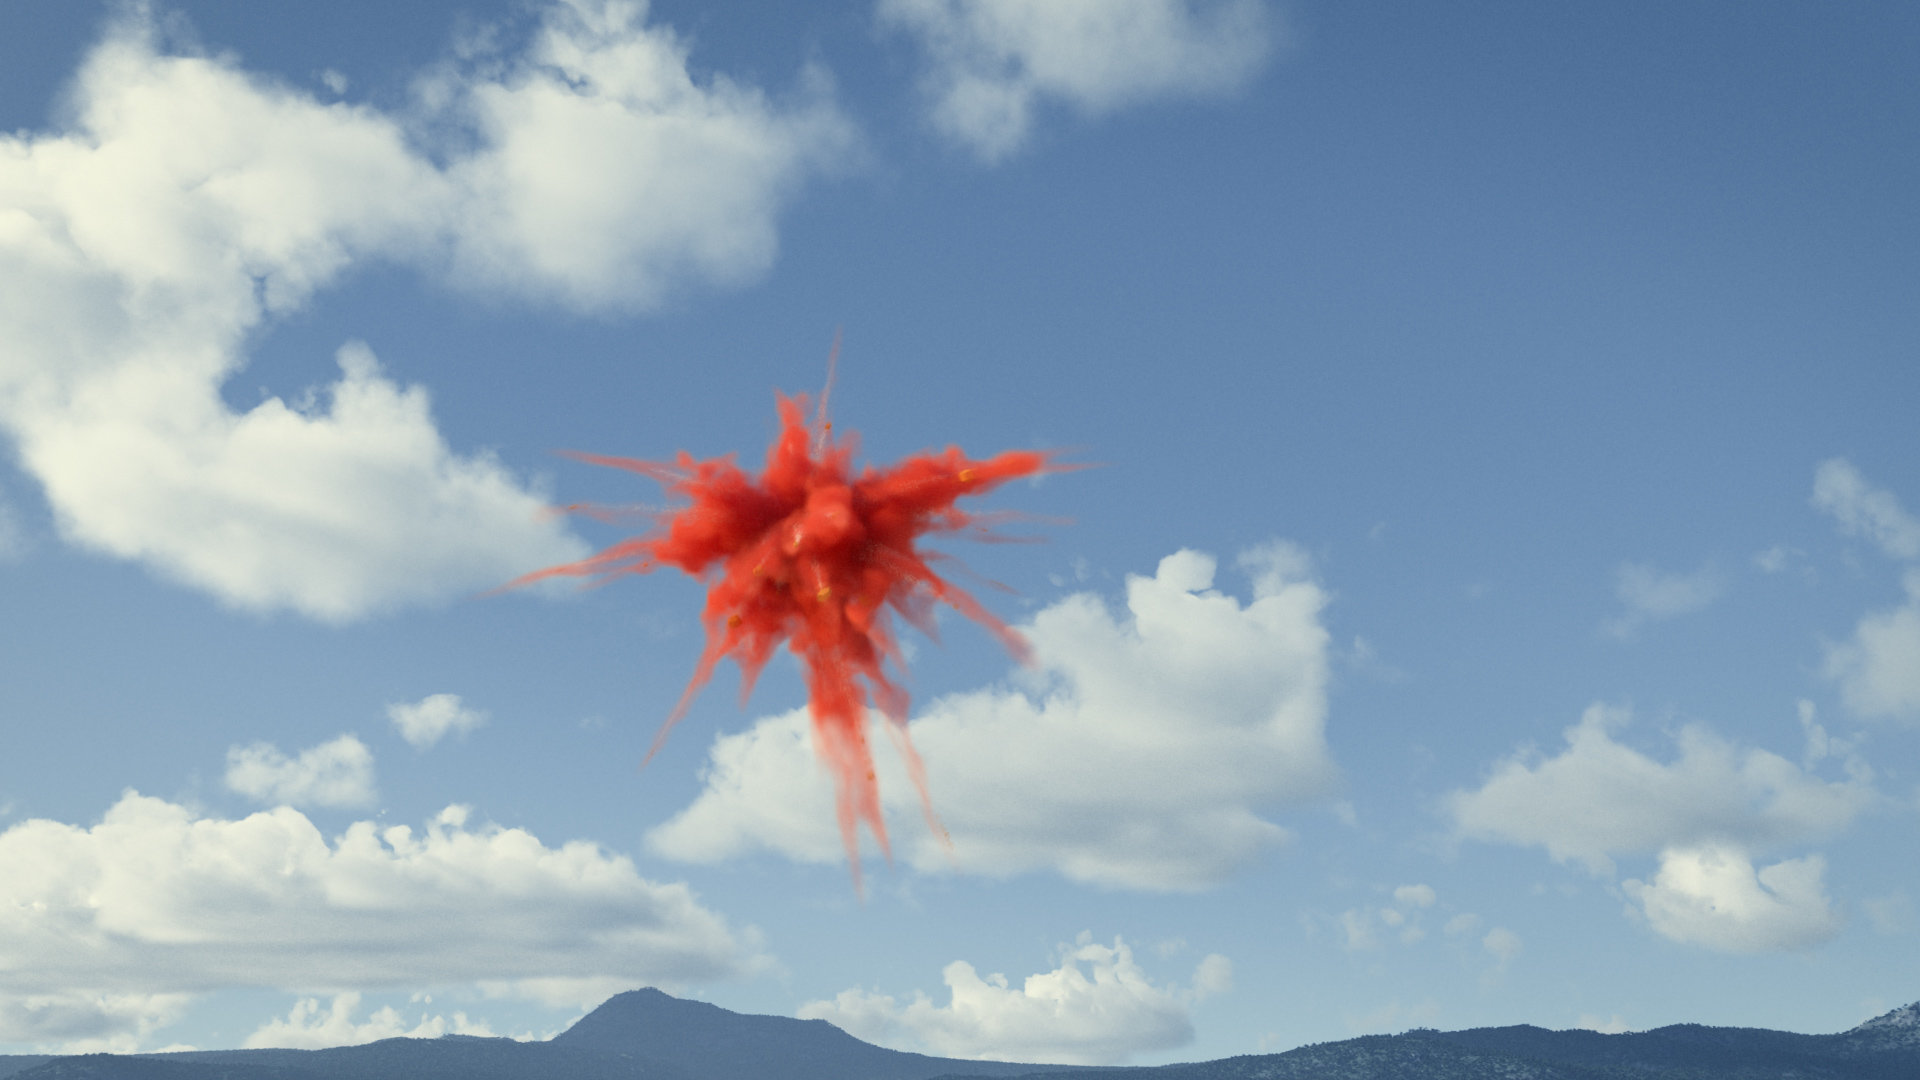
The last shot I used X-Particles for, was the one with colourful blasts in mid-air. The multicoloured smoke was simulated and rendered with the help of TurbulenceFD. But X-Particles played an essential role in this simulation, because I used particles as emitters for TurbulenceFD's smoke and, at the same time, used emitters for smaller particles of cane sugar with the xpSpawn modifier. Regarding the dynamics of the blasts, I used more modifiers than you would expect, because I wanted to achieve an animation that looked as realistic as possible. I used xpScale to reduce the size of big chunks over time to make them look like they fade away. I used two different xpGravity modifiers for larger and smaller particles. And the critical one; xpSpeed modifier, which had to hold back high-speed flying particles because the exploding sugar dust is supposed to be very lightweight, it would've been stopped by air resistance very quickly.
Which element of the 'Factory' was your favourite to animate?
I think it was the whole machine. It was something new for me because I used XPresso more than usual. When I animated the machine, I wanted it to have a cartoon-like motion with many moving parts in the mechanism. And I wanted to exaggerate the movement of those parts so it would look like the machine's details would break apart if you sped it up a bit more. I made a simple rig just for fun, which controlled the machine's vibration amplitude. I made several controls: control for the amplitude of the top part of the machine, the tubes aside, the steering wheel. And the speed, which was a global setting and spread across all other moving parts. So, first I chose vibration speed which matched my style. It affected all the moving parts simultaneously. And then I controlled the amplitude of selected components. There was a separate slider for the cogwheel's rotation speed, but it was not related to anything else in the machine. In short, I enjoyed doing all of this!

As well as your professional work, your online footprint is quite encapsulating. Do you actively update your social media to help further your professional reach, or is this done for other reasons?
I have lots of social media accounts on different platforms, and I find it hard to generate content regularly for all these channels. I would like to, but sometimes, I physically can't due to lack of time. Sometimes, I don't feel that a project I'm working on is good enough to show. More recently, I've been pushing myself to publish to social more, especially the work-in-progress projects because some tips and tricks from the working process could be appealing/engaging. Saying this, I always post big finished projects! I've also been developing websites, and soon I'll start publishing my web portfolio. I believe these channels will help me more in self-promotion and search engine optimisation in the future.
In your opinion, what is the best feature of X-Particles?
That's definitely xpFlowField. When I first saw it, I thought "Wow!". Before it was introduced in X-Particles, I sometimes imagined how total control over the particle flow could be done. And I pictured it something like the xpFlowField's container, where you lead particles with paths. And all the environment around them is considered and can serve as a "controller". It's not just a motion path, because there is also a strength of influence and you control the distance. Finally, the visual feedback of the particle flow is outstanding.
Thanks for taking the time to answer these questions. Before you go, can you give us your 3 top tips to become a better 3D artist?
1. Watch the world around you. Watching such random and trivial things like reflections in puddles, leaves shaking in the wind or even how the dirt is spread around the bus stop. This can help to supplement your movies with interesting and realistic details and to enrich your story. The secret is that nobody else is watching these things in real life.
2. To home in on the first point: pay attention to details. All details matter, because they're all part of a bigger story. Even if your viewer doesn't concentrate and notice those individual details you created, they will feel them subconsciously. Details add to the perception of a tiny world you're creating in a few seconds of animation.
3. And finally, attention to the detail requires time. You cannot create interesting stuff without effort. Usually, good things need much more work than ordinary ones, and you should count on this before starting any new project. Prepare to spend more time on the project, take more money for your time, but don't be lazy and don't do low-quality work.
Concept Art: Aleksei Segodin, client
Story boarding: client, Aleksei Segodin
Art direction, 3D modelling, animation, texturization, visualization & render, matte painting, compositing: Aleksei Segodin
Sound design: Jacob Thomas Czech